I am happy that you have decided to learn about archery, as it is my favorite hobby. Whether you are here to become Robin Hood or to become an excellent hunter, I am going to set you up for success.
There is so much to learn, but I will guide you through everything slowly so that you don’t get lost.
Lets jump right into it.
The Bow
Obviously, a bow is an essential part of any archery equipment. Without a bow, there is no archer. There are many different types of bows, all with their advantages and disadvantages.
Compound Bow
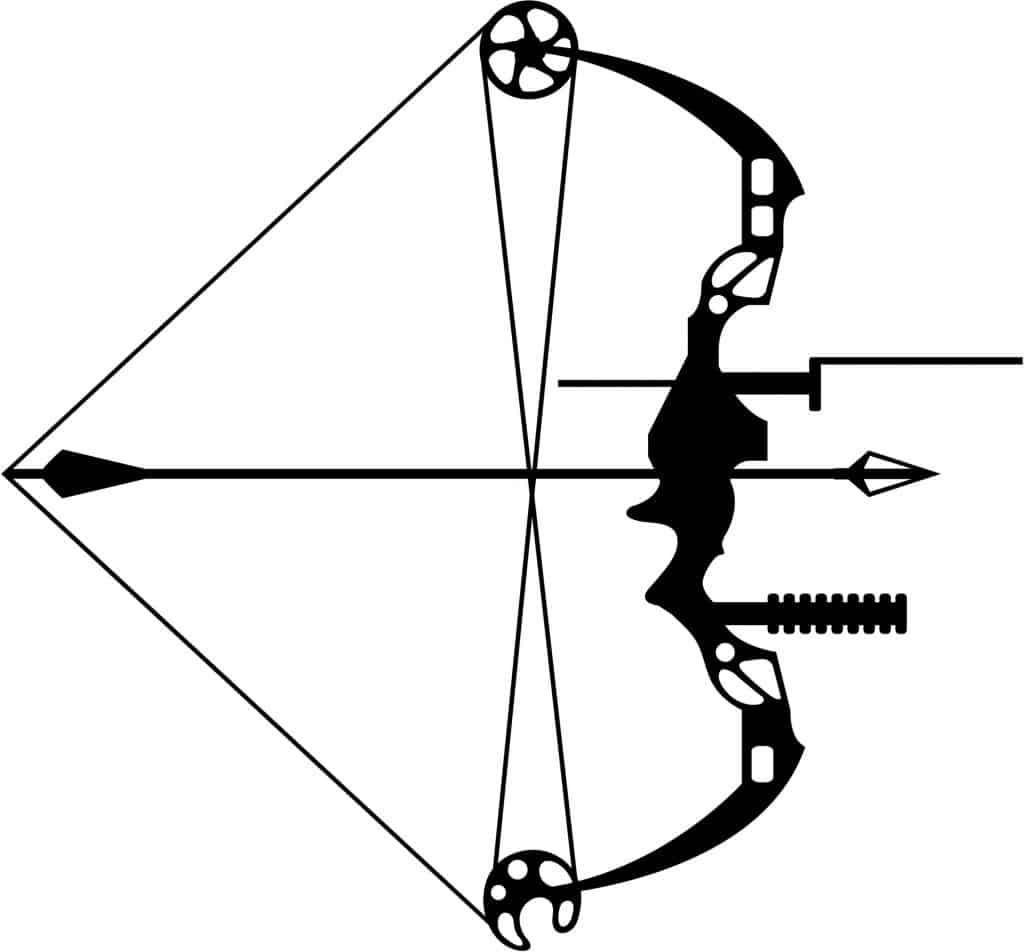
I once saw a marksman shoot a 3 water-balloons in a row from 100 yards with a compound bow. You simply cannot get that level of accuracy with any other type of bow (besides the crossbow, but we will get to that in a minute).
A compound bow is easily distinguished by the “cams” on each end of the bow. The cams rotate as you pull the bow back, allowing for the let off as well as intense power.
They tend to be a little pricey compared to more traditional bows. I spent $325 USD on my first compound bow, the Diamond EDGE by Bowtech.
When I got my EDGE, I started out at like a 20-pound draw weight. As a 12-year-old mamma’s boy, I really didn’t have the strength to pull any more than that. I was able to practice while building strength slowly on this bow. Occasionally my father would increase the draw weight and eventually I reached the bows max weight of 55 pounds.
I strongly encourage every new bow-man to start with a compound, mainly because they have adjustable draw weight and length. Once you figure those things out you can move on to the more traditional bows below.
Re-curve Bow
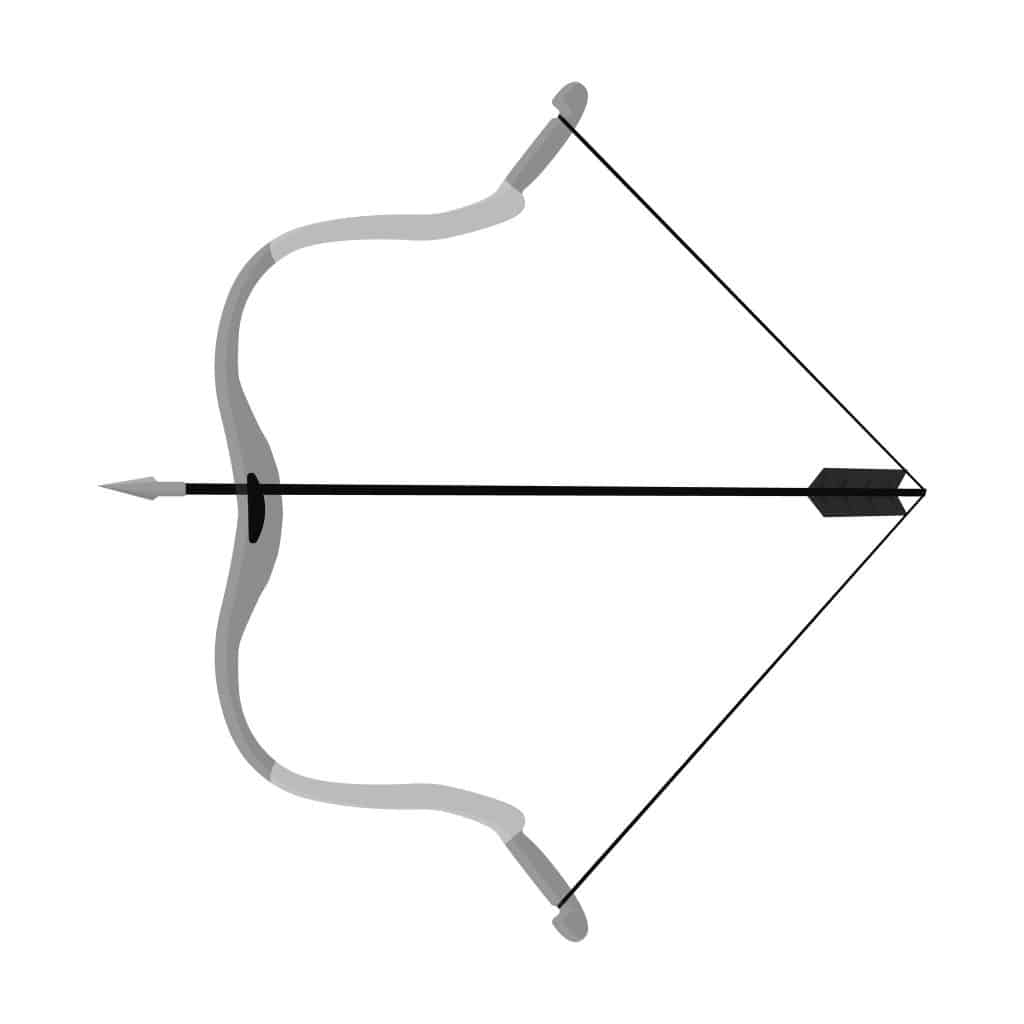
The recurve bow is the bow that many people think of when anybody mentions archery, and for good reason. This bow has been in use for thousands of years because of its size to power ratio. It’s relatively lightweight and is a lot more simple than a compound bow. These bows are generally pretty cheap, and you can get a great one for $200 USD.
My first bow was a recurve, and I felt like I was limited. I started shooting bows when I was 8 Years old, and the recurve was either too much weight or too little. I was wasn’t able to hold it long enough to aim, or it didn’t have the range that I needed to practice any further. Although they are really cool looking, I can’t recommend them for beginners that want to get really accurate. Many of them don’t even have a spot to mount a sight.
If you are pretty set on getting a recurve, then I recommend this one. It has several different draw weights and has the ability to come apart for easy storage. It’s a great bow and you could start with it and be fine.
Long Bow
The longbow is the bow that was used in medieval Europe from the early 1300s to the mid-1600s. These bows were effective in their range and simplicity.
Although they were the prime bow of their time, they are severely outclassed by modern bows, and the only reason you would use one is if you wanted to be like your ancestors. For the sake of this article, we won’t discuss them much.
Cross Bow
The crossbow is a deadly piece of machinery that is often accompanied by a really nice optic. These are pulled back by placing them on the ground and using your full body strength to pull them back.
Although they are the longest range and the most accurate of all the bows in this article, they are not usually allowed in archery competitions or hunting.
The thing about crossbows is that they are actually really fun to shoot. It is an awesome mix of rifle and bow that will have you feeling like a mighty marksman!
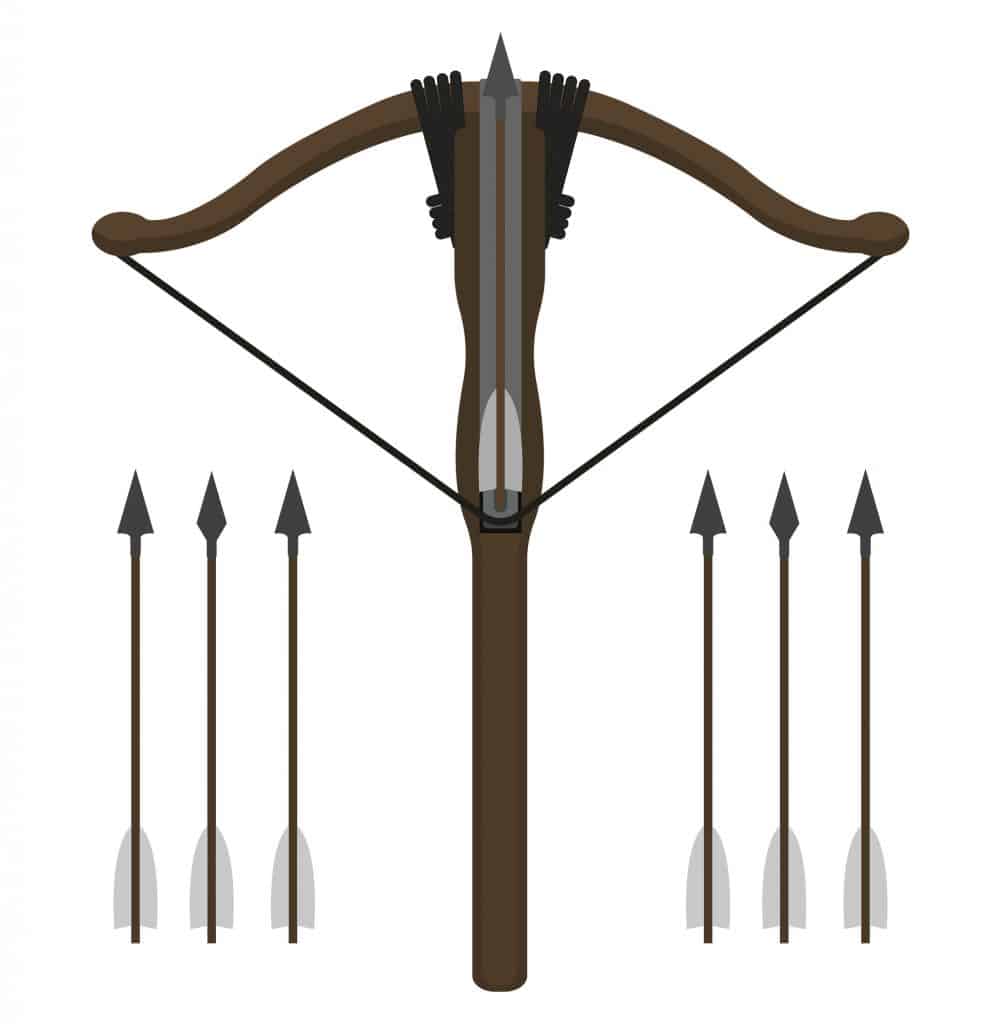
The Arrow
Each arrow is made up of 4 simple parts. Most arrows that people sell are a complete set of all four. If you are really into it, you can be like my father and cut, fletch, and put the tips in the arrows yourself using a tool like this.
Fletching
If you are just barely starting your journey into archery, this is an important part of your equipment for you to understand.
The job of the fletching is to keep your arrow straight as it flies. The fletching creates drag if it is off course and pulls the rear of the arrow back, making it fly straight.
An important part of the fletching is the “cock” feather. This part of the fletching is always a different color to indicate which direction the arrow should be oriented. We will dive more into this in the Sights/Arrow Rest section below.
If you want to get really into it, you can fletch your own arrows. The key is having the right equipment and knowing what you are doing. It really is in your best interest to just buy them pre-made to start, especially since you are probably going to miss and ruin a lot of arrows (no shame in that, I have shattered plenty of arrows in my time).
Nock
The nock is one of the least appreciated parts of an arrow. Without a good nock, you would have to hold the arrow in place yourself.
The nock is a simple clamp on the end of the arrow that holds it onto the string until it is ready to be released. It is generally clipped onto the bowstring underneath the nock indicator. This nock indicator is a little metal bead that is attached to the bowstring and indicates where you should grab the string to pull the bow back. They come standard on any modern bow.
Shaft
This is pretty self-explanatory. The shaft of an arrow is the main body of the arrow.
The shaft can be made out of all sorts of things including:
- Wood
- Aluminum
- Steel
- Carbon fiber
These shafts come in plenty of lengths, but you need to find the one that fits your bow.
Spine strength is a measurement of how much an arrow flexes underweight. This is not standardized in any way and each arrow manufacturer has published helpful charts for their shafts to help you decide what shaft fits your bow the best. Don’t skip over this part.
The worst thing that could happen is your bow completely shredding a carbon fiber arrow in your face while you are shooting. Always lean on the stronger side of things.
Tip
There are so many different tips out there that it can be really overwhelming for a beginner. To start, let’s break down what “Tip” means.
On the end of the shaft, there is an insert that allows you to have different tips at the end of your arrows. These tips fall into two categories. Practice tips and broadheads.
If you are only planning on shooting a target, you only need to focus on practice tips as broadheads are made for hunting.
Practice tips
These tips are slightly blunted arrow tips that are made to stop the arrow from going through the entire archery target. These tips vary a little in style but are generally really simple in design.
Broadheads
The Broadhead is designed for one thing: to take down animals quickly. Broadheads have so many different shapes, sizes, and designs. There are mechanical broadheads, fixed blade broadheads, and plenty more that I won’t dive into.
The difference between fixed blade and mechanical is in the name. Fixed blades are rigid, while mechanical broadheads have some moving parts. Here is a video of a mechanical broadhead moving through some ballistic gel.
Notice how it opens up? The idea is to have as little drag as possible while the arrow is flying through the air, but then expand to deal as much damage as possible when it hits the animal.
The issue with these blades is that it is a point of failure. Sometimes they open, sometimes they don’t. Here is a video of one of my heroes, Cameron Hanes, showing why fixed blades might have an edge over mechanical or expandable blades.
Sights/Arrow Rest
Many people don’t realize that bows can have sights, and all of the professional marksmen have them. A bow sight looks nothing like a sight that you might put on a gun.
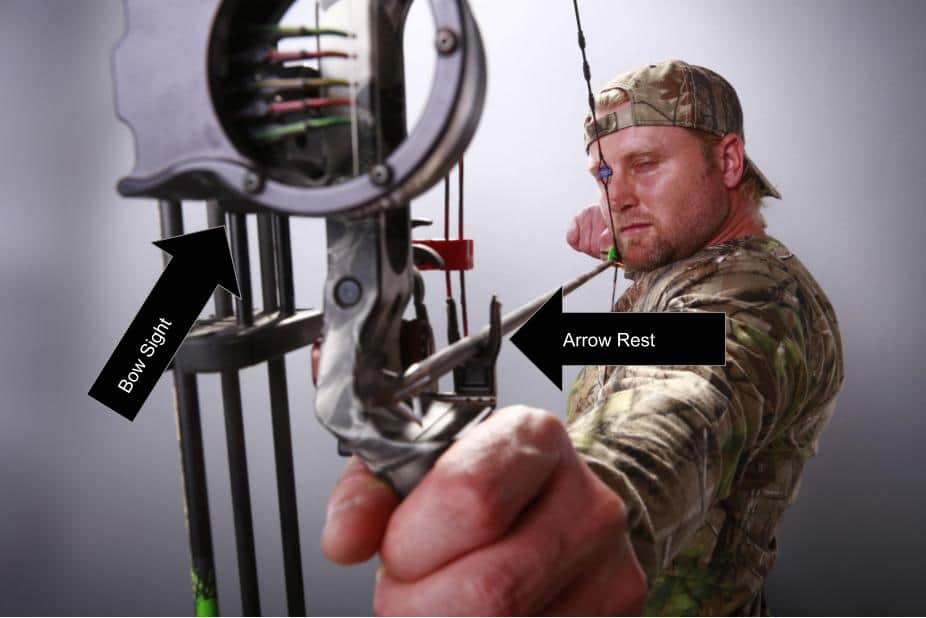
A bow sight works by lining up your eye with the pins of the sight with your target. Each pin is sighted in for a specific distance.
Generally, the top pin is designated for shots that are 20 yards or less, and each pin down is related to 10 yards more distance.
Some bows are outfitted with a small circle that is in line with the actual string of the bow. These little circles are called peep sights, and help a lot with consistency. The bow in the picture above is actually fitted with one of these sights.
The interesting thing about most bow sights is that they only work for the archer that sighted them in.
Other Equipment
Release Aids
Release aids are things that help you pull and release the bow string in the most comfortable way possible. In most peoples heads, bows are only pulled back with your fingers. In archery competitions for recurves and long bows, mechanical release aids are not allowed, and so people do use their fingers still. Here are some examples of release aids:
Index Finger Release: These are my personal favorite as they are really easy to pick up and use. They are basically a pair of specially designed pliers with a wrist strap. Really simple and effective. With many of the other releases, people tend to hurt themselves due to accidental early release. Nobody wants to punch themselves in the face!
Thumb Trigger Release: Very similar in application to the Index finger release, you pull back your bow and release by pulling a trigger. The key difference being which finger you use to actually pull the trigger.
Resistance Activated Release: Many of these releases are designed to surprise you so that you don’t jerk during your shot. The hinge release is perfect at this, as it actually doesn’t have a trigger. How it works, is you hold a safety until you are ready to shoot, at which point you pull back a little harder and the hinge releases the string when it hits a certain point completely out of your control. These guys are popular, but scare me to death.
Finger Tabs and Gloves: If you want to be as true to medieval history as you can, this is the way to go. Archers have been using these for centuries, and there is no sign of them stopping. All that these do is protect your fingers and reduce friction, but other than that you are in the driver’s seat. This is the classic way to do things.
Archery Range Finder
As an archer, knowing the distance between you and your target is crucial for accuracy. In order for a bow sight to be accurate, distance is a piece of information that cannot be overlooked. A range finder is a device that tells you the exact distance between you and the target. There are many different range finders out there, and they can be a little pricey.
The TecTecTec Rangefinder is fairly inexpensive, but gets the job done. Some range finders automatically adjust for shooting angle, but most people really don’t need that all that much.
Related Reading: 11 Best Rangefinder for Archery
Archery Targets
For many young kids just beginning archery, 2 hay bales with a spray-painted target will do just fine.
However, when you own a decent bow and are shooting with a draw weight that is more than 35 pounds, a stack of hay bales really isn’t going to work. Your arrows have a lot more punch than you give them credit, and will go through pretty much anything. You need a target designed for archery.
My father is the most avid archer I have ever met. He shoots every day without fail. He and I both use “The Block” archery targets because they hold up to the abuse that we put them through.
It is really important to always put your target somewhere with a strong backdrop, meaning there won’t be any chance of you hitting someone if you miss. Be careful as your bow might be able to go through a lot more than you thought. For example, I have had an arrow go through my fairly solid wood fence without any problems. Just be careful. Some great spots would be up against a tall hill or abandoned building.
Further Reading: Top 5 Most Durable Archery Targets for Beginners
Archery Arm Guard
The purpose of the arm guard is to protect your forearm against the impact of the string. Unlike a helmet in most sports, these aren’t there for the occasional accident. If you shoot without an arm-guard, you are going to only shoot one arrow before realizing their importance. People have gotten seriously injured because they forgot to put this on. You don’t need anything special, just something that is comfortable. Here is one that will work.
Related Reading: The 9 Best Archery Forearm Guards for Kids
Bow Case
Although not essential, a bow case keeps your expensive weapon safe.
Unlike guns, a bow is almost completely harmless to children because of the amount of strength that is required to pull them back. That being said, you still don’t want your kids playing with things they shouldn’t.
A bow case can be made of simple hard plastic with some padding inside to keep your weapon safe. These are really inexpensive when compared with a gun safe or lockbox. This one is fairly cheap and will work great.
Tackle Box
I am sure you are thinking “Why do I need a tackle box, I am not going bow fishing”
While bow fishing is awesome and you should try it, a tackle box is not only for fishing supplies. Tackle boxes are a great way to store all sorts of things that you will use with your bow. Some things that my father and I always keep in our tackle box that will help you maintain your bow and arrows:
- Bowstring Wax
- All of your broadheads when you are not hunting
- A good multi-tool
- Broadhead wrench
- Hex Wrench
- Glue for Fletching
- Practice Tips
- Replacement nock
- Wind indicator
The Ultimate Beginners Set Up
If you are looking for the basic equipment you need to get started, this is the place to be. The smaller stuff can be taken care of by the people at your local bow shop, and you will learn how to do a lot of things from them. I suggest buying your bow from a bow shop because they will feel more inclined to help you if it is their products that you are using.
- Bow: Diamond Edge
- Arrows: The easiest way to do this is to take your bow to an archery shop and they will tell you what arrows to get. The type of arrows you get depends heavily on your draw weight and length.
- Rest: Wisker Rest
- Sights: The sights that come with your bow will work fine to start
- Release aid: TruFire quick release
- Broadheads: Montec fixed blade
- Target: The block
That should be enough to get you started. There are some very minor accessories that you will need depending on where you buy your bow. Bow shops tend to give you a lot of the little things that you might need.
The Law Bow and Arrows
Is a bow a firearm?
A bow is technically not a firearm because there is no “Fire” involved, but many states throw them into the same category for simplicity sake.
Every single state has different rules regarding the use of a bow, and you should find out about your specific state and city guidelines.
As a general rule, treat your bow as a firearm.
Where to shoot
Some cities prohibit the use of firearms within city limits, and someplace bows into that category. The best thing you can do is head to an archery range, but that can be expensive.
The next best thing is to head to some public land and choose a spot with a good backdrop. Make sure that there is nobody inside the range of your bow. Relatively basic info, but practice is important and you need a place to do it safely.
Archery Pro Tips
#1 Anchor point is everything
When you are first starting out, it is really important to learn proper form. Learn how archers stand by watching plenty of videos. The most important part of form is what archers call anchor point. Anchor point is where your hand rests on your face or neck that helps you to be consistent. Once I figured this out, my effective range doubled.
#2 Be mindful of wind
Many people start out in a nice archery range, and that is great. The problem comes when you move outside to compete or hunt, and have never dealt with the wind before. Put some practice hours in while there is a breeze out so that you know what to do about it.
#3 Practice until the bulls eye
This is more of a mindset than a tip. Every time you go to practice, don’t stop until you get a bulls-eye. If you don’t feel accurate enough then move closer to the target. Shoot until you feel confident enough and then move back. This skill takes time, and you are not going to be a pro right at the start.
#4 Draw weight isn’t everything
Although having a fast arrow is great, it’s not your number one priority in the beginning. What is important is the correct form. Spend a lot of time at a draw weight that isn’t too straining on your body so that you can focus on form.
#5 Practice sitting, standing, and kneeling
This tip is mostly for hunters. You never know when you are going to need to shoot an animal from an awkward position, so you need to be ready. Sit in a chair, kneel down, and stand in an awkward position so that you can have some idea what your capabilities are. Don’t be the guy that takes a shot from an angle that causes you to only wound an animal.
#6 Workout the right muscles
People don’t realize how labor intensive bow hunting is. You need strong back muscles as well as arm muscles. Practice pulling your bow back even if you can’t shoot. Hold your bow out in front of you so that your arm can be rock steady.
#7 The lift release method
When I first started out, there was so much that I was told to focus on that I would struggle to be accurate. My father told me the way that he got accurate in the beginning.
Pull your bow back, and find the target in the sight. Aim below the target, and raise your bow until you are on the bulls-eye. Lay your finger on the quick release until the hair-trigger releases. The arrow flying should be a surprise.
Hopefully that information helps you to be an amazing archer!
<div style="display:none;"