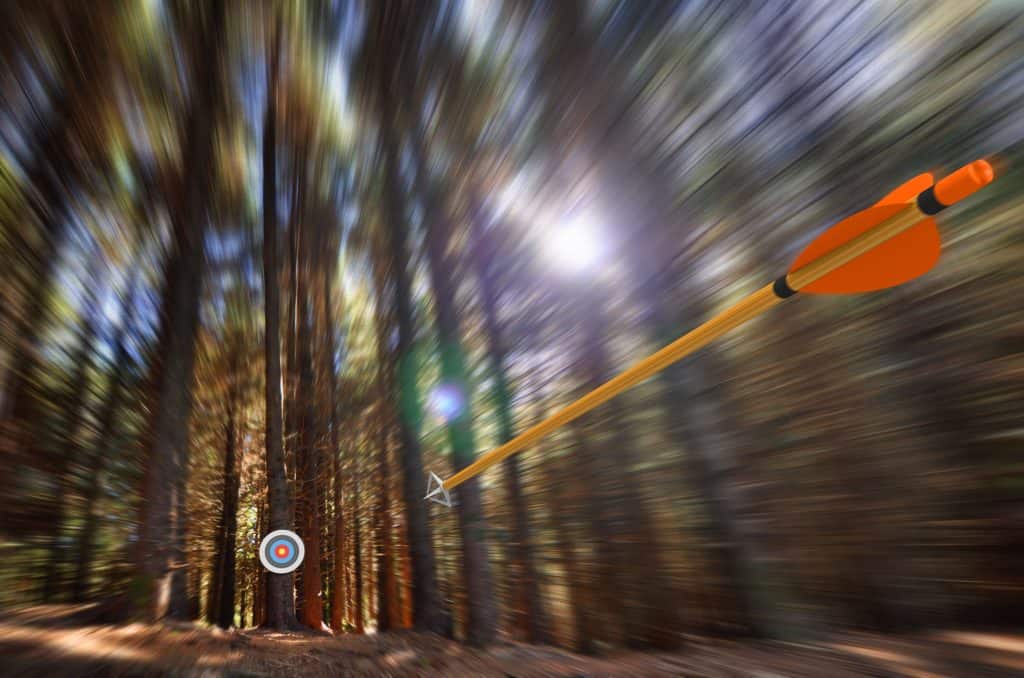
It can be really expensive to buy an archery target from the store. This expense is only increased as you shoot up your target and have to replace that target over and over again. That’s not fun.
To avoid this you can make your own targets. There are plenty of ways to build them but I’ll share 7 of my preferred DIY archery targets. These targets all vary in how they perform. Some will be very durable but will be more expensive whereas others will last only a few outings but won’t be a drag on your pocketbook.
Check out our Archery Page for more great content!
Target Design
Quickly before we get into the specific target designs there are a few fundamentals of target design that you should understand.
- Frame
- Backstop
In archery, these two items are the fundamental components of any target. The Frame is whatever rigid device is providing the target’s shape as well as providing its balance.
The most popular material for a frame is wood though you will often see PVC pipe, metal, or cardboard used as alternatives to wood for a solid frame for your target.
A backstop is the material that the arrow is shot into that will catch the arrow after it has been shot. Without a backstop you will be hunting down your arrows more than actually shooting.
Backstops are often spongy material that will disperse the pressure of the fired arrow through them to slow the projectile’s momentum. Common backstops include hay, straw, cardboard, cloth, carpet, plastic, and foam.
Most of the designs are easily adaptable you should pretty much be able to exchange one material for another. This is especially true for the backstop material, so if you have extra material lying around use that to save you money.
Finally you’re going to want to put a bulls-eye on your target. Like the one down below.
What Materials Can I Use For Homemade Archery Targets?
Although you can purchase a variety of targets online or at your favorite sporting goods store, they can get fairly expensive. Don’t worry; there are plenty of ways to make homemade targets at your house. You may even have some materials in your home or garage right now.
The following are everyday items that can be used to make your DIY targets.
- Cardboard: We all probably have cardboard boxes that come from Amazon every week. Instead of breaking them down and taking them to the recycling center, you can use them on your next DIY target. Below, you’ll find precisely how to incorporate them.
- Styrofoam: Styrofoam is another excellent option and one you are likely going to have from old packaging. To make the target thicker, you can glue pieces of styrofoam together.
- Old Clothing or Rags: If you have a bunch of old clothes or towels, you can pack them into a cardboard box or sandbag to create your very own homemade target.
- Bales of Hay: If you live on a farm, you’ll likely have bales of hay. These have been used for years for target practice, plus you can make use of them afterward.
- Old Tire: If you have an old tire lying around, you can quickly turn it into your own archery target. Fill the center with foam or other dense material, and hang the tire from a tree. This will last you years.
- Old Mattress: This one will only work if you live on some land with no neighbors, merely due to its size, but a mattress is a great way to practice your shooting.
Now that we’ve touched on only some of the materials you can use to make your very own DIY Archery Target continue reading to see how some of these and more can be turned into some pretty cool pieces.
Homemade Archery Target: Full Cardboard
| Cost Estimate | Durability | Best Arrow Type |
| $10 – $20 | Low | Bullet points |
When looking for cheap materials to shoot up there are few options cheaper than cardboard. Most of the time you’ll be able to grab a few boxes from a store that has to unbox a bunch of items they shelve or from someone that has just finished moving. For more ideas of where to get cardboard check out this Apartment Therapy article on the topic.
Materials
- A 22′ by 13″ by 16.5″ Cardboard Box
- Extra Cardboard
- Tape
- Glue
For your frame, you are just going to use a cardboard box. The Cardboard box doesn’t need to meet the specifications listed above but that’s the box proportions used in the video below. After you have your frame, you’ll stuff the insides with more cardboard allowing the cardboard to serve as both the frame and as a back stop.
Find a box that has a fair length and height but that has a width that is only about foot to two feet. The longer the width is the more material you will have to stuff, but you want it to be wide enough that a stiff breeze, or a launched arrow will not knock it over.
The larger the width the more material that you’ll need to stuff inside the box, so you’ll want to have a slim box that will be able to endure arrows being fired at it without toppling after each hit.
Homemade Archery Target Construction
After you have your box take you extra layers of cardboard and cut them so that they match the dimensions of the long sides of your box. Stack about 17 of these together and then tape the whole group of them together. Do this twice.
Take the taped stacks of cardboard and glue them to the inside of the box. Weight the stack down to the side of the box, and let it rest for a couple of hours for the glue to dry.
Repeat this process with your other taped stack of cardboard on the other side of the box.
With both sides securely glued to the sides of the box. Take whatever cardboard clippings or extra sheets that you have and tape them together to form a small cardboard bar that will reach from one set of stacked cardboard to the other set of stacked cardboard that is glued within your box.
When you have the right size glue this bar just a few inches from the bottom of connecting the two sets of stacked cardboard. Once again, add some weight and wait for the glue to adhere to the cardboard inside.
Finally, go ahead and glue on the target, you can find the PDF up above, and your have something to mark your accuracy as you shoot.
Pros and Cons
Cardboard is cheap, often free if you know where to look, but with that low price comes low quality as well. Don’t expect this target to hold up much more than week or two of constant use.
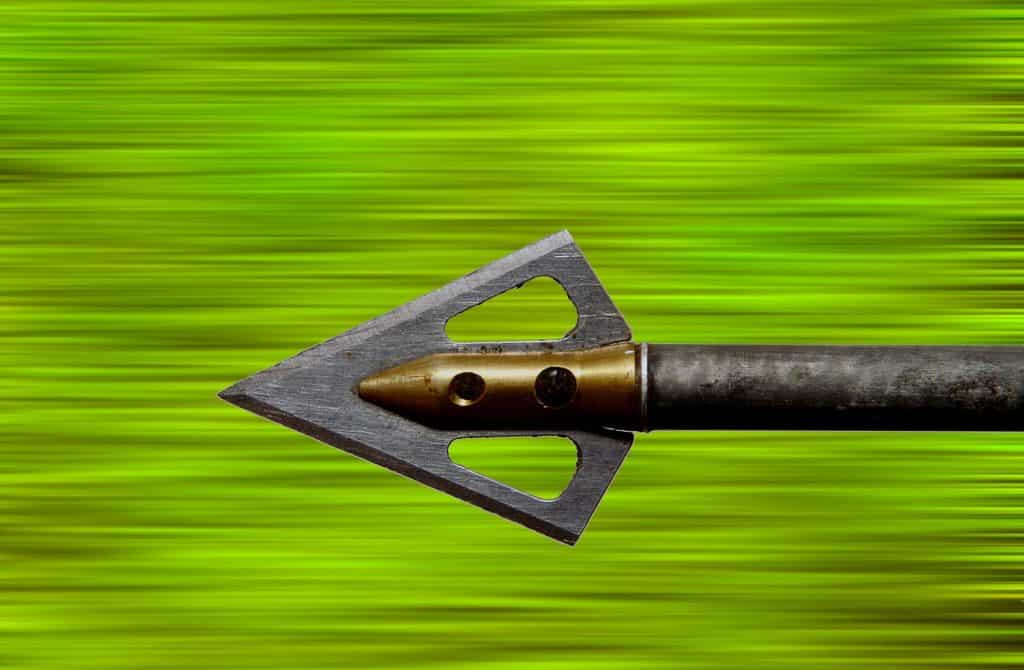
Another Con is the arrow type restriction. As with many of the targets on the list, you won’t be able to use broad-head arrows on this target. Or at least I wouldn’t suggest it.
Cardboard doesn’t always warp the best to the broad head of an arrow and can cause some damage to the arrow if it really gets stuck in the target. Additionally, you could shoot blunts at the target but you’ll likely send your target flying every time you do, so it is best to stick with bullet point arrows.
Homemade Hay Target
| Cost Estimate | Durability | Best Arrow Type |
| $20-$100 | Low | Blunts |
When looking for a solid backstop material that can also double as a self-made frame, a bale of hay is a great option. Hay is a bunch of herbaceous plants that have been compressed together. Since they have a solid shape already all you need to do is attach a target.
Materials
- Hay bale
- Some form of plastic covering
- String
It is best to cover hay bales in plastic to attempt to help preserve the hay from falling apart from your shots and to lessen the hay’s appeal to animals. So cover them with a plastic cover that you have available.
Hay has one major downside, it falls apart fast. This is in part because it is a collection of loose material that has been compressed. You are shooting an arrow at it so it’s no surprise that it starts to come apart.
This problem grows worse as hay is both edible, and a very comfortable home to critters. So you do not want to store hay outside if avoidable. This is especially important during the rain. The hay will become a place for animals to take cover and may rot from the getting wet. (maybe remove)
Construction
Perhaps construction is overselling the process here. It’s simple, buy a bale, or several bales of hay, then set them up as you like.
Cover them with plastic such as using a tarp or a mattress cover.
Then attach the target using a string. Cut a hole in the targets and tie the string through the hole in the paper and then around the bale or bales of hay the target is attached to.
Pros and Cons
Hay bales are almost always one of the options that comes up when some mentions inexpensive targets. I personally think there are many better options that come at a lighter expense but if you are able to get your hands on hay for cheap than you can certainly go for these targets.
The major negative to a hay target is that when using only hay the hay will disperse and you will find that you can shoot arrows through the target. This is one of the reasons to use a plastic covering on your hay bale as it will help keep your arrows in and the hay compact.
You don’t want to be using broadheads with hay as pulling the arrow out can cause the arrow damage, and while you can use bullet point arrows those are the arrows that will fly throguh the target.
So given the weight of the hay bales using blunts is the best option as they won’t shift the target to much and you won’t have to worry about them going through the target.
Puzzle Mat Target
| Cost Estimate | Durability | Best Arrow Type |
| $80 – $120 | High | Broad-head |
This design comes from Instructables.com. If you want to see the original guide click on the link and you’ll be taken there. I’ve adjusted the guide to make it a little easier to follow.
Materials
- Four 1″ by 1″ by 36″ pieces of wood
- Two 1″ by 1″ by 3″ pieces of wood
- 2″ Nails
- Two 3″ by 3″ by 36″ pieces of wood
- Chicken Wire
- Puzzle Mats
- Metal Angle Braces
- Screws
- Carpet (3′ by 3′)
Construction
First you want to lay out the puzzle mats. they are going to serve as your primary back stop. Yow to make a 3×3 grid out of them each mat is 1′ by 1′ so a 3×3 grid will make a 3′ by 3′ surface. Stack them so they are about 1 foot thick.
Create the frame. Using the pieces of wood cut 2 of the 1-inch by 1-inch by 36 inches pieces of wood in half. Do the same for one of the 3-inch by 3-inch by 36-inch pieces of wood.
Next, you’ll construct the bottom of the frame. Lay the longest 3″ by 3″ piece flat on the ground then attach the shorter 3″ by 3″ pieces to each end of the board. They should be perpendicular to the longer 3″ by 3″ board with both short pieces going up. Attach them using the 2″ nails and metal angle braces This will serve as the base of your frame.
You will construct the top of your frame in the same way just using the two sets of the 1″ by 1″ sets of wood. You’ll attach these top parts of the frame to the bottom at the ends of the upward base frame pieces.
To complete the frame add the 1″ by 1″ by 1″ blocks to the top corners of the frame and nail it in to secure the top of the frame.
Next you’ll want to add the chicken wire to the back face of the frame. This will be used to secure the puzzle mats.
Take the 3 by 3 grid of puzzle mats and lie it in your frame on top of the chicken wire.
Finally, you can attach the 3′ by 3′ carpet to the front face of the frame. You can attach your target here and will be good to fire away.
Pros and Cons
The puzzle mat target is one of the best targets on the list. Though it isn’t the most durable you can easily replace the parts that are being shot up whether that be the carpet of the tiles. So while it is at a medium durability it isn’t hard to maintain this durability. That’s definitely a positive.
Another positive is that it is one of the few targets on the list that can be used to fire broad-heads at. I would suggest not using the carpet cover is using broad-heads is the plan, as the carpet my snag on the arrowhead but generally it shouldn’t be a problem.
The largest negative here is price. Both from the puzzle mats themselves and cutting wood to the right sizes if you don’t have the tools for it yourselves and extra materials lying around you’ll have to spend around $100 for a target.
Homemade Carpet Archery Target
| Cost Estimate | Durability | Best Arrow Type |
| $50 – $80 | High | Bullet points |
Materials
- 1 2″ by 12″ by 6′ piece of wood
- 4 threaded dowel rods
- 8 washers and nuts (they need to fit with your dowel rod)
- lots of carpet
Construction
Cut the 2″ by 12″ by 6′ in half so that you have two 2″ by 12″ by 3′ boards.
Drill four holes in the corners of each board, make sure they are in the same spot on each of the boards because you’ll be fixing the threaded dowel rods through each of the holes on both boards.
Set one piece of wood on the ground as the base of your target. Push the dowel rods through each of the holes on that board and then attach washers and nuts to the ends of the dowel rod to serve as feet to your target.
Next, take whatever carpet you have and cut it into 2″ by 11″ strips. You’ll take these strips and stack them on top of your baseboard. You’ll want to get this stack as high as you can as it will shrink a little when you compress it in the next step.
Take the other board and fit the dowels through the holes you drilled into it. push the wood down as far as you can on to the carpet stack you have. Then taking the rest of your washers and nuts put them on the top of the dowels and twist them down as far as you can.
You want this to be as well compressed as possible so if you need to sit on the top board to compress the carpet more go for it.
You have your target at this point, but you can improve it by making the carpets a little more even lay the target with its face to the ground and then step on it. You should be able to even out the carpets by doing this.
Pros and Cons
This design is one of the easiest and coolest designs on this list. It holds up really well and it’s really not that hard to replace the carpet if it is getting shot up too much.
The largest negative about this design is the expense of carpet. Luckily you can use low quality carpet so if you know a carpet depot is getting rid of old stalk you can try to take it off their hands for cheap. Otherwise carpet isn’t eaxactly the cheapest amterial to get your hands on.
But, since its the only material you’ll really need for this design you’ll still spend around 50 to 80 dollars so long as you are able to but in bulk.
The other negative is just the amount of time it takes to cut the carpet into strips. It’s not difficult to do but it is a bit time consuming.
Homemade Ethofoam Target
| Cost Estimate | Durability | Best Arrow Type |
| $100 | Medium | Broad-heads |
One of the large frustrations with targets comes from their inability to work with certain arrowheads. Specifically, broad-head arrows are some of the best arrows for hunting arrows but will often rip your targets.
Luckily, Ethofoam targets should serve broad-heads, as well as bullet-heads, and field-heads. So you’ll be able to fire away while practicing the odd weight fo a broad-head arrow.
Materials
- Five 2′ by 2′ sheets of Ethofoam
- One 30″ by 30″ by .5″ piece of wood
- Three 30″ by 5″ by 1″ pieces of wood
- Two 30″ by 2″ by .5″ pieces of wood
- 1″ Nails or Screws
Construction
The back of the frame will be your 30″ by 30″ board. Take that board and add the three 30″ by 5″ boards to the bottom and two sides of the board. The best way to go about this will be nailing through the back board into the boards that you are attaching. If you are using screws you can do the same thing with the screws.
With three sides added to the backboard, you can fill that incomplete box with the five sheets of Ethofoam. When those are added you seal the front of the box with the two 30″ by 2″ by .5″ slim pieces of wood.
It’s best to have these pieces at the bottom of the frame and wherever the top of the Ethofoam is.
Leave the top of this frame open. You’ll be able to switch out the strips of Ethofoam whenever they get worn out. So there is no real need to worry about how poorly the sheets of Ethofoam are doing after you are done with them.
For an example of how this was done check out the original photos of the target from Archeryaddix.com.
Pros and Cons
This is the best target for broad-head arrows. That’s really the selling point here. If you want to practice using your broad-head arrows then go right ahead on this target. There is no need to fear about your arrows because this target is made for it.
The other perk is that the Ethofoam sheets are easy to replace. So as long as you have Ethofoam around you won’t have a problem replacing and fixing up your target.
The negative is Ethofoam is expensive. You can get two sheets of 4′ by 8′ by 2″ for about $200. This will give you about 3 replacement sets on top of the one you start with but is pretty expensive. But that’s the cost required for a quality broad-head target.
Compressed Straw Target
| Cost Estimate | Durability | Best Arrow Type |
| $50 – $80 | High | Bullet points |
Materials
- Two 29″ by 4″ by 1″
- Two 28″ by 4″ by 1″
- Six 4 foot bands of Compressed Straw
- 1″ Screws
- Wheels
Construction
First, take your six 4 foot bands of compressed straw and cut them in half. This will leave you with twelve 2 foot bands of compressed straw. Compressed straw isn’t that difficult to cut you can just cut the edges with a box cut and that is usually enough to break it in half. You will be using that compressed straw as the backstop for your arrows.
Too build the frame you’ll want to use one of the 29″ piece of wood as the base of the frame. Center one of the, now two foot, bands of compressed straw on the board and then screw the 28″ pieces of wood vertically on either side of that compressed straw.
Once secured pile the straw on top of one another within that frame. Once you’ve reached the top you are going to attach the other 29″ board to the top of the frame. For this step you want the straw to peak out just a bit over the top of the vertical boards that you have set up.
You are going to be using compression to keep the condensed straw in place. So as you drill into the top to screw the top on successfully you’ll push the condescend straw together firmly keeping it in place. If your vertical boards are too long you can always cut them down to fit the size that you need.
Once you have screwed the top on, you’ll want to add wheels to the side of the target. Adding this will allow you to move the target around more easily as this will weigh well over 50 pounds so not something that you want to be carrying around.
Pros and Cons
The benefits of the target revolve heavily around its durability. This target is going to last quite a long time. That means you’ll have years of shooting that comes out of this one target. The condensed straw bands are really thick and really serve to make the target as sturdy as it is.
However, this thing is heavy, uncomfortably so. We are talking over 80 pounds heavy. That is not something you want to be carrying around. Which is why you want to add wheels to it. Depending on where you’re practicing though it may be difficult to wheel a target around. So, weight is definitely a challenge.
Plastic and Wood Archery Target
| Cost Estimate | Durability | Best Arrow Type |
| $50 | Medium | Bullet points |
Materials
- Six 15″ by 1″ by 2″ pieces of wood
- Eight 36″ by 1″ by 2″ pieces of wood
- Four 36″ by 16″ by 1″ boards of OSB
- 1 and 1/4″ Nails
- 1″ Screws
- A plastic filler of some kind
- Outdoor Tarp
- Two 36″ by 36″ pieces of Cardboard
Construction
You are going to start buy building two frames. You can do this by connecting 4 pieces of the 36″ by 1″ by 2″ pieces of wood to make two squares.
To support these two squares you are going to need to use six 15″ boards. Attach two of the boards at the bottom two at the top and the third set somewhere in between the top and the bottom. Each of these pieces will be used to connect the two square frames.
Next, you will add the OSB to the frame of the box that you have created. This will serve to further the rigidity of the box as well as help keep what you use as a backstop in place.
To add a back to the box you are going to add the cardboard sheet that you have to the back of the frame. You then are going to stuff the frame with whatever you are using as your plastic backstop. This can be as simple as grocery bags, a lot of them, or actual rolls of plastic that you can find at the store.
Seal the whole box by adding the final cardboard square to the front of the box. You will want to be pushing plastic down here, cause that means the box will be full.
Finally, wrap a tarp around the whole thing and then secure the tarp with nails to the edges of the frame that you have built. If you want to add handle you can add them where you placed the mid sidebars on the frame.
You can find the details including the sketch of the original project and the creators material list at Elk101.com. The following youtube video is created by the same creator and follows that process.
Pros and Cons
The only parts of this target are the plastic, tarp, and cardboard. All of which can be easily replaces while maintaining the frame which is a large plus.
The structure is the most complicated to put together of the targets on this list, which can be a little frustrating but the video and instructions from the website do away with most if not all confusion on the target’s construction.
Finally, the target is a bit unwieldy, so not the easiest to haul around with you into your choice practice area.