Not only are you a thrill seeker that likes to rappel steep cliffs and obstacles but now you want to dabble your toes a little more in the water, quite literally. Waterfall rappelling is an adventure in and of itself but is more of a once in a lifetime activity that you do to mark off the rappel bucket list when successfully completed. I personally recommend to rappel somewhere solid and where there is limited moisture; however, there are several precautions and measures that can be taken when waterfall rappelling to make it as safe as possible.
Waterfall rappelling is definitely not an activity for an amateur to do by themselves or with fellow beginners. You are taking an extreme sport and making it that much more difficult and potentially dangerous. If you make plans to try waterfall rappelling, go with several trained professionals or highly experienced climbers. Make detailed plans of where you will go, what equipment you will need, and rehearse what obstacles will be encountered.
The right people and preparation will help you to be confident in your skills and abilities to descend safely. If you can do this then, you will be able to put yourself in an elite group where few have ventured. Move over Tarzan, there is new competition in town that will be flying down the rappel and experiencing the pure adrenaline and thrill of waterfall rappelling.
Finding Locations to Waterfall Rappel
Some of the recommendations that I would make when checking your state or other locations is to search somewhere that is easily accessible and permits rappelling and rock climbing.
If you want to find some great and legal waterfalls that may be rappelled ask around at local climbing gyms, search climbing message boards, or do a general search online. It is always best to practice your decent on waterfalls that have been previously tried and tested by others because their experience will provide critical information on what to expect and how to prepare for the descent. Not to mention that you can gauge the level of overall difficulty by what others have reported.
Waterfall Rappelling Safety
A few tips on added precautions that can be taken to provide greater security when waterfall rappelling are as follows:
Fireman Belay – This would be one of those times where I am actually going to recommend that your experienced rappel buddy perform a belay known as the fireman belay. Because this is a heightened level of difficulty due to rappelling either next to or in the waterfall the conditions will be extremely wet. The wetter the conditions the greater the odds that you could slip on your feet or with your hands. Having water cascading on you or near you adds an additional element that is new and will require greater focus to navigate these wet conditions safely.
As I mentioned, the fireman belay is an excellent method for a partner to be prepared to stop an uncontrolled descent if something goes wrong in the rappel. To perform the fireman belay you just need the partner to be at the base of the falls or cliff. This partner will lightly hold the rappel rope elevated in front of their face. The partner will not grip the rappel rope tightly but let the rope dangle loose between their hands, keeping them in a cupping shape where the open portion of their hands facing them. The partner can choose to stand directly below the rappel or they can stand back a bit. I recommend standing slightly back to have a clear view when the rappel is taking place and to avoid any potential falling debris. That being said the fireman belay partner should be wearing a helmet if some debris were to fall.
If during the rappel grip is lost or another accident occurs that requires the partner to stop the descent they will grip the rope tightly and pull down with their hands. The hands will now be lowered to the waist or lower and may even be in a semi-squat for added footing stability. This motion is causing the rope to pull down on the ATC or belay device causing the descent to completely halt. When in the fireman belay the rappeller is no longer able to control their descent. At this point the partner can loosen their grip slightly to safely lower the rappeller or wait for direction that the rappeller has regained total control and is now ready to continue a safe descent down the waterfall.
Autoblock – Take the time to tie the autoblock for your rappel which creates added security in the event of a fall. This knot will assist to stop you in midair if control is lost. It is a simple technique that can assist when it is least expected, especially when waterfall rappelling. Follow this link to learn how to tie the Autoblock.
Clothing and Gear – And as always bring the right gear for the level of difficulty in the rappel. Bring tight fitting clothing, wear a helmet (ALWAYS), bring climbing shoes, etc. Being dressed right will help you to perform at your very best. Keep your gear fairly simple on this rappel meaning take only what is absolutely needed so you don’t carry any dead weight.
Setting up the Rappel
Know that this is a broad explanation of how to setup for a waterfall rappel; however, each location and situation will merit different techniques, skills, equipment, and precautions to take. Take every measure to properly prepare and train with an experienced professional so you are confident in your abilities.
As with any rappel you will need to find good anchors. Most likely there will not be anchor bolts at the waterfall but maybe you strike the gold and find that it has been mapped out and anchors set. In which case your job is that much easier. I will assume that there are no anchor bolts and you will need to set at least three anchors using large, living trees or protruding rocks. Everything should be solid and show no possibility of moving or breaking free when the anchors are set. The following are the steps to setup the rappel:
- Use slings (Amazon link) or webbing to create your anchor and at least set 2 -3 equalized and separate points to anchor from. Once set, double check the slings to make sure they are not loose and will be able to bear your weight.
- Connect the quickdraws, one to each bolt hanger. The quickdraws must face opposite directions to provide optimal safety when the rope is added.
- Now place the rope through the opposite end of the bolt hangers on the quickdraws. Prior to adding the
rope it is highly recommended to look over the rope and check for any abrasions, strings, knots etc. If it’s all good proceed to add the rope. - Run the rope all the way through the quickdraws until you get to the middle mark of the rope.
- Now tie a Stopper Knot to each end of the rope. This makes sure that you STOP and don’t rappel off the rope ends.
- Now shout “ROPE!” and toss the ends of the rope down the descent.
- Because you should be rappelling with others that are experienced, one of your partners should be at the base of the waterfalls to setup the fireman belay once the rope has been tossed over. The partner should not be standing in any flowing or pooled water to provide optimal support if the fireman belay is needed. This partner can also work as a guide to provide directions throughout the descent.
- Attach a locking carabiner to your belay loop and clip in the ATC, if you haven’t done so already.
- Grab both strands of the rope and double it over. Slide it through the ATC and clip the loop that you slid through the ATC with your locking carabiner.
- Lock the carabiner.
- DOUBLE CHECK EVERYTHING. Check your locking carabiner, the knots, and hitches to make sure that everything is secure prior to your descent. Check that both ends of the rope are on the ground, that your partner below is prepared to perform the fireman belay, and that the ends of the rope have a Stopper Knot securely tied at each end.
Rappelling Down the Waterfall
- With your right hand, grab the loose rope leading to the ground. This will be the break and is supported by the ATC. Never ever let go of the rope with the break hand. To break as you descend lower the right hand below the waist while holding the rope, it will stop the rope from running through the ATC. If the right hand is raised up, the rope will run freely and will place whomever is rappelling in grave danger of falling. Do not raise your right hand.
- Your left hand will be the guide hand and will hold on the other end of the rope that has been secured to the anchors.
- As you descend shout “On Rappel!”
- Start to rappel, use your guide hand to feed the rope through the ATC.
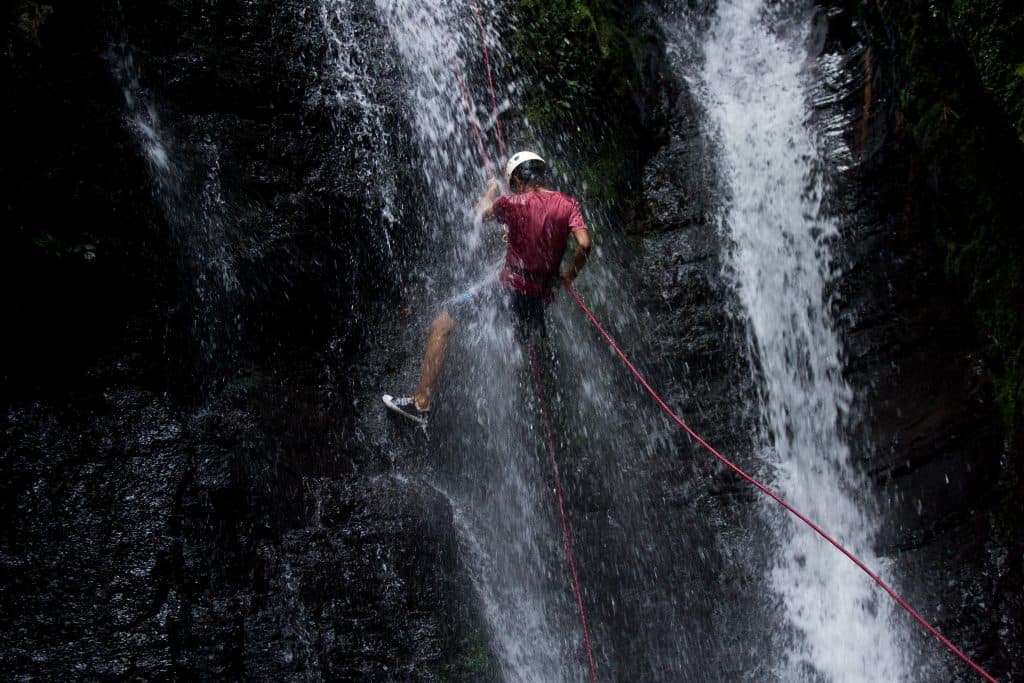
- While lowering yourself, keep your legs perpendicular to the waterfall during the descent. Know you may choose to descend in the midst of the waterfall or to the side of it. This decision is up to you and what your comfort level. If descending in the waterfall make sure that the water level is low and that you are able to touch the rocky surface with your feet throughout the descent, allowing you to descend in a controlled manner.
- Go at your own speed and turn your head slightly to check for any obstacles. Don’t overthink the actions you have trained yourself to do in a normal rappel, just continue to descend in a steady and controlled pace.
- Once you reach the ground pull the ropes out of the ATC. As a formality tell your spotter “Off Rappel.” You have now officially completed waterfall rappelling and can be proclaimed the king of the jungle.
Conclusion
As I have been saying all along, with the right preparation you can rappel down a waterfalls safely. There are tour groups throughout the US and internationally that offer waterfall rappelling in a controlled environment. If you need something to break the ice prior to doing the rappel on your own this may be a good option for you. Mind you these rappel tours can cost upwords of $200 bucks a pop. With the right training and support from trained professionals you can plan to do it on your own and forgo the additional costs charged by these groups.
Rappelling waterfalls is an amazing experience and different than any other rappel you have other done. It adds a unique element that will increase your rappelling expertise and excitement for the sport.