Have you ever heard of someone “chinking a log cabin?” This is something that is crucial to log cabins and after this post is over, you’ll be able to recognize it whenever you see log cabins.
What is log cabin chinking? Chinking is either a synthetic or mortar substance that seals the gap in joints between logs on a log cabin. It is a flexible sealant that is crucial for any log home. Chinking protects the cabin from gaps where cold air or outside elements to get in and ruin the structure of the wood.
Chinking has been around for years! Try the 1800’s. Over time changes have been made to it, including the invention of synthetic chinking. This post is your one-stop shop for chinking knowledge.
What is Chinking?
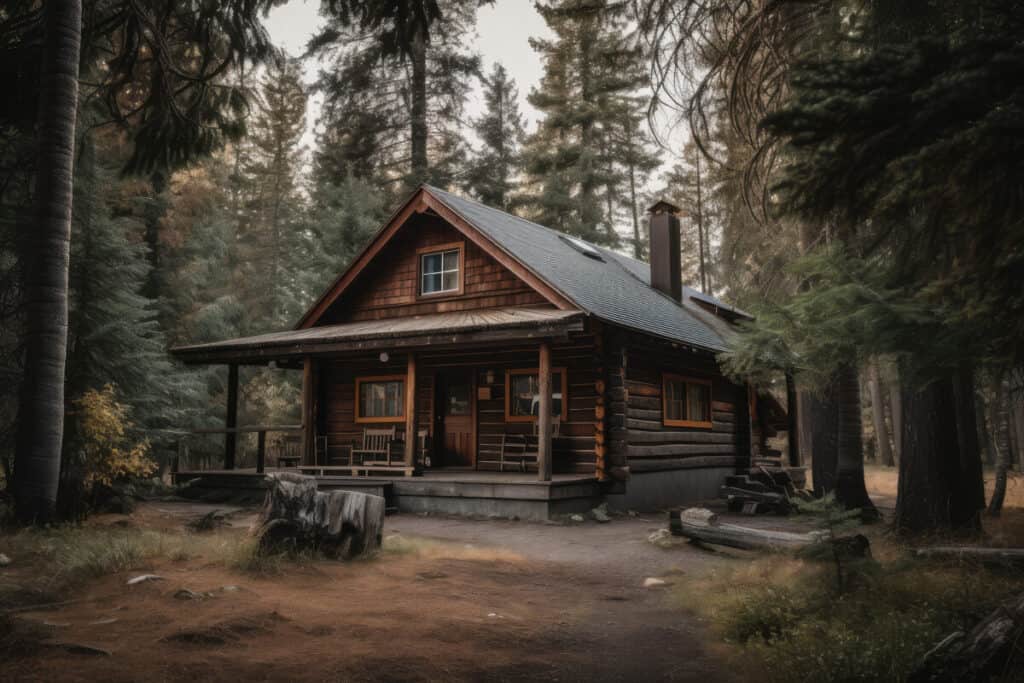
Chinking is not only a funny word but also a good, elastic, stylish way of sealing a log cabin. It looks like the old-fashioned Portland cement-based mortar and it is used to seal the joints between logs. This stuff is most effective for sealing long (like really long) strips of gaps between logs. It looks like what they used to do years ago.
Chinking a cabin allows the cabin room to breathe but also protecting your cabin from the outside elements.
Chinking is to logs as mortar is to bricks.
Log Cabin Hub
Logs are wood and that means they are susceptible to moisture. Logs over time will bow or crack. The environment will change which will make the logs expand and contract.
What is the Purpose of Chinking Log Cabins?
Chinking will seal the logs from outside elements like the rain or snow because they are able to be flexible. This stuff also protects the logs from standing water that could eventually rot the wood.
Logs aren’t perfect and they aren’t going to meet exactly. This is one of the many reasons why chinking is so important. It creates a nice seal to cover up any gaps in the logs. This is the ultimate way to have a good seal and little to no maintenance. The last thing you want to be happening your cabin is rot. That is no fun.
There are two kinds of chinking: Synthetic and Mortar. Here is some more information regarding chinking and what either of these types do. This page also has content.
Best Materials for Chinking Log Cabins
There are two kinds of chinking today: Mortar and Synthetic.
Back in the good ol’ days chinking was traditionally made from a mixture of clay, sand, lime, silt, ash, and dirt. A lot of stuff just thrown together, but it worked. Whatever you choose to get, make sure it is fixible.
Fun Fact: Mortar chinking is fire resistant but synthetic is not.
Mortar Chinking Log Cabins
Mortar chinking has the more traditional look. This is the old fashion way of chinking homes. This is the more, do it yourself style. It is rustic and it looks nice.
Another reason why it is the do it yourself style is because it is significantly cheaper to buy than the synthetic chinking. I’m talking 10% of the price it would cost for synthetic. Yeah, I’m not kidding.
If you are using mortar, you are going to want to use logs that were cut in the area. It’s better to use local logs since they are already there and adapted to the environment.
Mortar chinking is $0.15 per 1 inch high and 1 inch deep. It’s incredibly cheap as you will see in a minute.
Synthetic Chinking Log Cabins
The synthetic chinking is used more for log cabin kits. Generally, they are water-based with a few that might be oil based. The synthetic kind is made from acrylic or petrochemical elastic substances which work in the same function as the mortar does.
Log cabin kits need the synthetic chinking because the logs will not be used to the climate. The synthetic chinking holds well is and adaptable.
Synthetic chinking is $1.20 per 1 inch high and 1 inch deep. Yeah, if I were to make a cabin, I would definitely make it myself. That money would add up fast. This is why I said mortar is a 10th of the synthetic price.
Visit Our Cabins Page for More Great Content!
How to Chink a Log Cabin
Chinking is something that you can have done entirely on your own. It is a little awkward and it is very time consuming. If you have the money, you could hire some labor.
First Stage: Getting the Logs Ready
Clean logs are a must. It is a tedious task. They have to be dry and clean of everything. No dust, wax, oil, etc. They must be clean so I would only recommend doing this in the spring or summer.
The temperature for the logs should be a nice spring day. Nothing too hot or too cold. The logs need to be warm enough so that the pores are open. If the logs are too cold and the pores are closed, it will be much harder for the chinking to hold onto the logs.
Second Stage: Backer Rods
When you start chinking, you’re going to want some backer rod for to set in the cracks between the joints. Backer rods are a cylinder, synthetic foam for fitting in between the large and deep joints in the logs.
You should fill this space mostly with the backer rod. You don’t want to spend more money than you need to for chinking, trust me.
This will allow for better adhesion and allow the chinking to settle in for the most sealing potential it can have. All log houses do this and I would highly recommend it.
There is some pretty intense reasons for why you want to use backer rods like how it’s better for the chinking to attach to 2 surfaces instead of 3 like it would without the backer rod. In easier terms, it is just easier for the chinking to move around with the logs this way.
People have suggested homemade backer rods but I am not into that. If you are looking for some place to buy backer rods that will not cost you too much, I would look here.
To start, you will want to fill the cavities both inside and outside with the backer rods. If your plan is to use chinking mortar instead of the synthetic kind, you will need to put chinking nails in.
You will want to angle the nails downwards into the lower logs. Place them every few inches apart. Now your preparations are complete and you are ready to chink!
Third Stage: Applying the Chinking to the Logs
There are different methods of inserting chinking. They aren’t necessarily better than another. They are only different.
You can either use:
- A Grout bag with a nozzle
- Chinking gun
- Chinking pump
- Trowel
Chinking will come in either chinking guns or pails. You could make your own too if you wanted. I will leave that up to you.
Whatever you decide to do, insert your chinking in the middle of the gap. Don’t go across the entire side of the house in one go. Take your time and cover smaller portions. You should cover around 10 feet in an hour which sounds crazy but you need to take your time and do this properly.
You want to use a foam brush to smooth out and fix any messes in the chinking. If your hand is unsteady, I am sorry. You will have to do your best. You will want to make sure that you the chinking has good grip/connection with both top and bottom log. I really can’t stress that enough.
Give the chinking the time it needs to settle before touching it again. Now just spend the rest of your summer doing this and you’ll be good! Okay, I am mostly kidding, but you will need to put a good amount of effort into this.
Fourth Stage: Repair and Maintenance
As long as you do the things I have said, your chinking should last for about 20-30 years. Enough time for your kids to grow up and maybe their kids a little. The checking that is usually done is for older mortar chinking. Synthetic is not that old.
The only things you really want to check up on is really hot temperatures or lots and lots of rain. These two things can bring down the duration time of the chinking.
Generally, you want to make sure to repair small little cracks of a minimum of 2 inches. If your chinking has failed and it is falling apart or has too many big holes, it is probably best to try again instead of repairing it.
Repairing can get expensive though. It can cost up to $200 to repair each year.
How Long Does Log Cabin Chinking Last?
As mentioned in the previous section, log cabin chinking should last at least twenty years. This is just a minimum. Depending on weather conditions and how well the chinking is being maintained, your log cabin chinking can last up to 50 years.
You may be wondering how weather can affect the lifespan in your chinking. Extreme weather, such as severe heat, below-freezing temperatures, an abundance of snow, and even harsh winds, can all affect log cabin chinking.
If your cabin is located in an environment where any of these scenarios occur regularly, it can shorten the lifespan of your chinking.
Further Reading: How Long Does Log Cabin Chinking Last?
Can I Chink My Log Cabin in Cold Weather?
Just as weather can shorten the longevity of the chinking, you need to pay close attention to the weather when you first apply or redo it. The best weather to do your chinking will be with temperatures between 45 degrees and 75 degrees Fahrenheit.
Chinking in direct sunlight should be avoided if at all possible, as well as rain or freezing temperatures.
There are ways to get around chinking in freezing weather, but it is usually best to hire a professional team with the proper warming equipment to assist with the job.
What is the Difference Between Chinking and Caulking?
Chinking is the material that goes on the outside of the log cabin to protect the inside from air drafts and small, annoying critters. It comes in mortar and synthetic forms. I have already talked a lot about this obviously so I am going to explain caulking a bit more.
Caulking is a similar material but without much texture. Caulking is more elastic as well. Caulking is better for smaller portions that need touch-ups. It is great for holding together things and creating a waterproof barrier.
It also works great for sealing horizontal cracks, which apparently are called “checks.” It’s just best for small things here and there so keep one around.
What are the Pros and Cons of Chinking Log Cabins?
We’ve thoroughly discussed what chinking is and how to do it. If you’re still questioning whether it is worth your time and effort to do, we’ll lay out some quick pros and cons of chinking your cabin.
Pro: You will be able to seal all the nooks and crannies of your cabin to keep out cold and moisture.
Pro: Its relatively easy to do once you get the hang of it. Many YouTube videos can visually walk you step by step.
Cons: If done incorrectly or when the weather temperatures are not optimal to apply, your chinking can blister. If this occurs, you’re in for more work. The blistering will need to be popped, sanded, and reapplied.
Cons: It’s going to cost some money, but in my opinion, it is a necessary cost. Currently, a 5-gallon bucket of chinking will cost you about $160. If you hire a professional, they will charge anywhere from $2.50 to $6 a foot for one face of the logs.
The History of Chinking
As I stated earlier, chinking mortar used to be made out of clay, sand, lime, silt, ash, and dirt. All of this made a great way to seal up holes and joints between logs. The adhesiveness of this old style was lacking though.
Obviously, nothing synthetic existed back in the 1800’s and neither did the modern version of the mortar.
I think one of the things that I never thought about before writing about cabins in general was the fact that in a log cabin, the logs don’t fit perfectly. They are not taken through a factory to be cut perfectly. They are raw and natural. I think therein lies the appeal.
Because of this, the logs will not line up to cover some holes. Also another problem is the weather and the temperature. Whether it is hot or cold, the logs will react. This can cause problems.
This is why chinking was invented. This stuff probably felt like it was sent from above. Without this, the gaps would create a draft and small insects and pests would get in. It sounds like a horrible time.
Naturally, log cabin builders realized quickly that something had to be fixed. They figured out a way to do it with sand and dirt and all that other stuff. They had clay and mud and other things as well to help, but only so much could work.
Fast forward awhile and we have the modern mortar and synthetic kinds of chinking. These work far better. With modern technology, it is so much easier to to create chinking to be effective.
Many are just made up of cement and acrylics. There are different kinds.
But despite the fact that we have these modern conveniences, some people want to create their own. There are different recipes you could find online or on YouTube. If DIY is your thing, then go right for it.
Chinking is a huge part of the log cabin building experience and it probably connects you with the past. It is really interesting to see what people before us did and trying to experience the same for ourselves. I am glad that I could share all of this information with you.
Related Questions
What is chinking in a log cabin made of? Modern chinking is an elastic sealing substance one uses on a log cabin for the joints between the logs. It is supposed to look like old Portland cement which in ancient days would seal log cabins. Today a mortar compound is used and so is a synthetic one. Historically clay, sand, lime, silt, ash, and dirt was used.
How long does log chinking last? Some say 20-30 years and others say 40-50 years. So somewhere in between. Extreme weather can affect the duration of the chinking.
How much does it cost to seal a log cabin? If you were to build a 1,500 square foot house, it would cost you around $3,000 to $7,500. The cost of repairs would be much less because it is more of a touch-up. If your chinking fails though and is falling apart then you may need to redo an entire wall or the whole house.