A number of friends and I had gotten together for dinner, and started talking about what we used for our kokanee setup, and by the end up the night, we had settled on a kokanee crack recipe that we all think is pretty magical. I’ve used it ever since, and it has absolutely been a game changer. This recipe is for summer fishing, but I’ll go over ice fishing briefly at the end.
Here is how I make my Kokanee Crack
- Green Giant Steam Crisp Shoepeg Corn
- Pautzke Fire Cure
- Pautzke Fire Dye
- Pautzke Nectar
- Garlic Powder (or Garlic Salt)
- Anise
- Canned Tuna
Now let’s dive into the nitty-gritty on how to make this stuff and why I use the ingredients that I do.
My Crack Recipe
Shoepeg Corn
Kokanee salmon LOVE shoepeg corn. Even if you haven’t done anything to it, like soak it in something that makes the fish go crazy, the fish seem to love it almost as much when you give it to them plain. I’ll talk about scenting your bait in a second, but let’s go over a couple of tips for using shoepeg corn in other ways first.
“Fresh”
Like I just mentioned, it doesn’t seem like you HAVE to do anything do it, the kokanee salmon seem to treat it like candy. I do have one recommendation though if you’re just going to use it right out of the can. (One of the largest recorded kokanee caught was caught using corn)
Don’t open it until you’re ready to use it. You know when you open a fresh bag or can of food, and you can really smell it, and it tastes great, but then you put it in a Tupperware, and even if it’s just a couple hours later, it just doesn’t smell as strong, it seems a little muted? Call me crazy, but I totally think that happens to shoepeg corn if you open it before you’re ready to use it. Take the original, unopened container onto the boat with you, and open it just before you put in on your hook. That way, you’re guaranteed maximum freshness and “shoepeg scent”.
Color
A great way to enhance your shoepeg corn is to buy corn that has been dyed or to buy dye to add to your corn. Most dyes will come scented, but we’ll talk about scents next.
Kokanee salmon can see color, and several colors seem to catch their attention and make them angry, which is what you want. Go for bright, neon colors, specifically reds, pinks, and oranges.
If you opt into adding dyes to your corn instead of buying corn that has already been dyed, it will come with instructions, so I won’t cover that process in too many details. The MOST important thing to remember is to KEEP IT REFRIGERATED after you open it. If you don’t it will go bad, which is bad, because it gets soft, and won’t stay on your hook once it goes in the water, and all your effort and money you’ve put into it will be wasted.
Scents
Scents are my favorite part of this recipe. I’m ashamed to admit that it wasn’t until I started kokanee fishing that I realized the importance of scented bait when you fish. Of course, I knew that bait was scented (my mom never let my dad open the new bait we’d buy him in the house), but especially when I was little, I thought the smell was just a byproduct of the taste. Bless my heart.
There are a LOT of scents you can use, but I’m only going to go over the ones my friends and I agreed had the best rates of success.
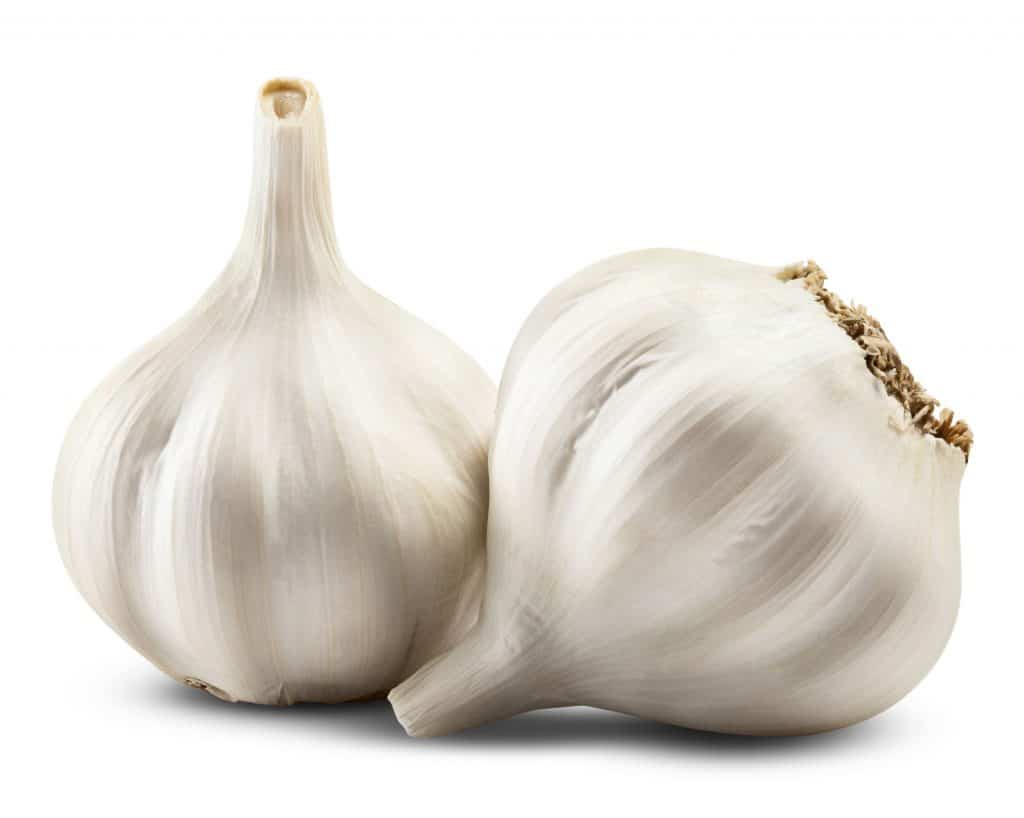
Garlic
I’m not sure why, but I have the most success when I use garlic scented shoepeg corn. The most popular theory behind garlic is that it makes the kokanee salmon mad, and in this case, mad is not only good, but it’s also GREAT.
Kokanee feed mainly on zooplankton, which means you won’t really ever be fishing with anything that looks like something in their regular diet, so you have to make them mad enough to attack your bait. Thankfully, kokanee as a species seem to have anger issues, and things like the smell of garlic seem to be enough to throw them over the edge.
Garlic scented shoepeg corn can be made at home! Stick with the Green Giant shoepeg corn brand. Open your can of corn, and add one to two teaspoons of garlic powder to the can. Seal it, shake it up, and stick it in the fridge. You don’t need much, garlic gets stronger the longer it sits, so keep that in mind before you add it.
Tuna
The tuna scented corn definitely works, although I can’t understand for the life of me why it does. Tuna fish is most certainly not on the menu the kokanee salmon eats off of, and really, neither are other fish in general. But, like my dad used to say, if it ain’t broke, don’t fix it!
Making tuna scented corn is pretty similar to making garlic scented corn. Open the container of corn and a can of tuna. Drain the tuna juice into the can of corn, seal the corn up, and stick it in the fridge. For the love of all that is holy, do NOT leave it open and unrefrigerated. You’ll regret it, especially if you left it to sit in a hot garage or shed. Or, heaven forbid, inside your house.
Scenting the Corn
If the basic instructions I just gave are enough instruction for you to make what you want, go ahead and keep scrolling. If you want more specific instructions though, keep reading, and let’s make a batch of my favorite “Kokanee Crack”!
You’re going to need
- Green Giant Steam Crisp Shoepeg Corn
- Pautzke Fire Cure
- Pautzke Fire Dye
- Pautzke Nectar
- Garlic Powder (or Garlic Salt)
- Anise
- Canned Tuna
Step 1 – The Corn
This is a trick I learned from Google that will help everything stick that you’re about to apply to your corn! Make sure you don’t skip this step. While it may seem unnecessary, your corn won’t be as viable for as long if you skip and move past it to step two.
Open the can of shoepeg corn and drain the extra liquid out. Then dump the corn on to a couple of paper towels. This will dry the corn out slightly, but not too much, making it a little bit sticky and ready to absorb the ingredients you’re about to add. Once it has that sticky feeling to it, you’re ready to move on to the next step!
Step 2 – The Cure
TIP – Use different colors of cure. Not only will this make it easier to keep track of the different kinds of scents you’re going to end up using, but you’ll be able to try out different combinations of scents and colors on the fish, both of which make a difference when fishing for the kokanee salmon.
Once your corn is sticky, move it to some fresh paper towels. You CAN keep it on the old ones, but if you do, the cure will be inclined to stick to the damp spots on the paper towel, as well as the corn, and you want it to stick just to the corn.
After you’ve spread the corn out evenly over some new paper towels, cover the kernels with the cure. Don’t overdo it, but make sure they’re liberally covered. Gently jiggle the paper towel around to move the corn, making sure all surfaces are exposed to the cure, and that it’s actually sticking to the corn, and not a damp paper towel.
Step 3 – The DRY Scent
Get your DRY scents ready. For me, that means the garlic powder and the anise, NOT the tuna or the nectar. Similarly to the cure, sprinkle each scent on a different color, doing your best to evenly coat each pile. Shake the corn around to make sure that all surfaces are exposed to the scent. Make sure you are keeping everything separated by color, making each color a different scent.
Step 4 – Move the corn to containers
Make sure these containers are containers that can be sealed, because you won’t be moving the corn again until you take it out of the container to fish with it. You’re also about to work with liquids, so paper towels aren’t going to cut it anymore.
Step 5 – Apply Dye
Yes, your corn has already been dyed by the cure, but the cure itself is not particularly dye-fast. The actual dye will last longer, and has been enhanced with UV, which is ESSENTIAL in the world of kokanee fishing. Kokanee salmon can see light on the UV spectrum, so making your bait more visible to the prey you’re hunting is never a bad idea.
The amount of dye you’re going to add will be dependant on the size of the container you’re using, and the amount of corn you have, so play it by ear and make sure you add enough that all of the corn has been dyed. Don’t feel like you have to go cerazy with it, I’ve found that the corn takes the dye pretty well, and that you won’t need a ton of it.
Once you’ve added the dye, seal up the container, and shake it around the make sure the corn is evenly covered, coated, and dyed.
Step 6 – Liquid Scent
Yep, you heard right! You added dry scent before, and now you’re going to add liquid scent!
Choose one kind of liquid scent per color, or shake things up even more and split each color of corn into two piles, and add one kind of liquid scent to one pile of each color, and then the next kind of liquid scent to the last two piles to each color, to get the best odds of finding a good combo that works for you and your fish.
I use the juice from the canned tuna I buy at the store, and the pautzke red nectar. You can be generous with this, as these are the last ingredients you’ll be adding, and you’re going to want to make sure everything is nice and absorbed, but you do NOT want to have too much, if any, excess in the bottom of the container. If the corn gets soggy, it’s not going to stay on your hook while you fish with it.
Seal up the container, shake it good, and stick it in the fridge until your next fishing trip! You are SURE to have an amazing fishing trip with your new home-cooked bait.
Other Important things for this to work
Location
Let’s start with the biggest things and work our way down. This will be the only “uncertain” part of the recipe. It is a little harder, since, more than likely, we all live in different locations, but there are a number of things you can look or consider when you’re trying to find the best location for fishing kokanee.
Check for Kokanee
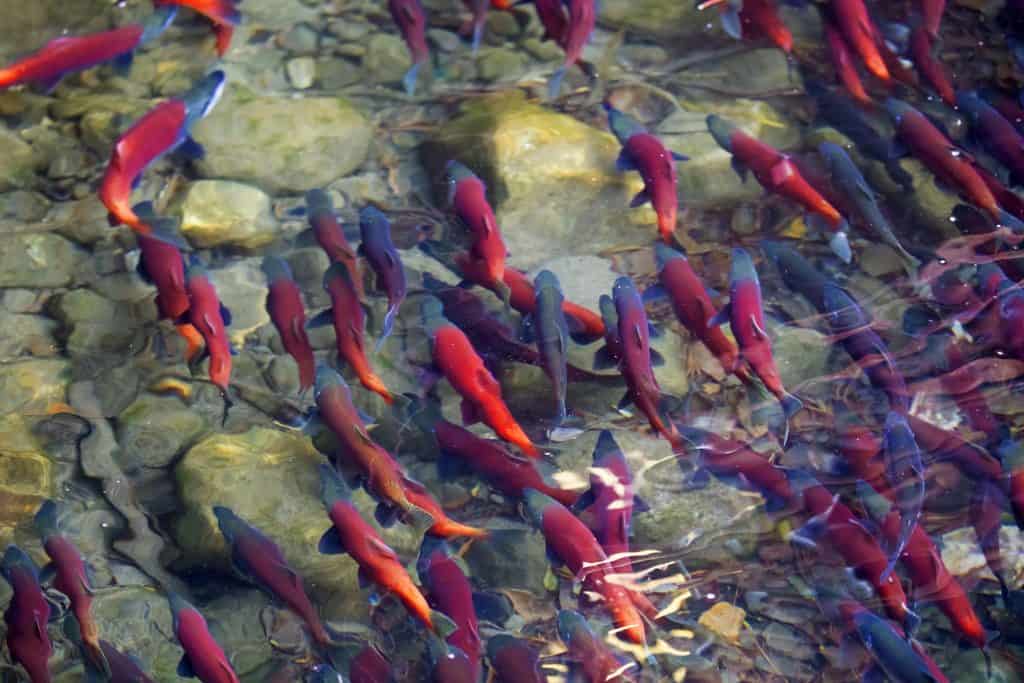
This SHOULD go without saying, but just in case we have anyone new here, make sure you check that Kokanee have either been recorded in surveys, or are stocked in the location or locations you’re considering. Kokanee salmon aren’t in every body of water, and the majority of them are in the further western parts of the United States and Canada. Not sure how to check that? There are a couple options available to you.
Check with your fishing buddies, if you have any, and ask them if they know of any good locations to fish for kokanee. Face to face interaction not your cup of tea? The internet has your back. With a pretty high rate of success, there will be a website somewhere, that will tell you where you can fish for kokanee in locations near you.
Maybe you already have a place in mind and you want to check if it’s worth fishing that area for kokanee? Check your Fish and Game website, or the Fish and Game website for the state the you want to fish in. For example, on the Idaho Fish and Game website, you can look at a list of the bodies of water in Idaho, and sort them by the ones that have had kokanee recorded in them from recent surveys taken of the area, and whether or not those bodies of water are stocked with kokanee.
Fishing Pressure
Is the area you want to travel to heavily fished? If so, why? If not, why?
Kokanee will grow larger based on availability of food and population. The more of them there are, the smaller they’ll be, because they get less food per fish. The fewer of them there are, the larger they’ll be, because they have more food available for each fish. So you get to decide which trade off you want. A larger chance to catch a smaller fish, or a smaller chance of catching a larger fish?
Boating and Recreational Traffic
Fishing in the early morning or evening, which I’ll talk more about next, comes with a number of perks, like the decrease of other boats and other people who make be using the lake or reservoir you want to fish for recreation. Boating pressure will chase the fish you’re trying to catch deeper into the lake and further into hiding, making them a lot harder for you to catch. Try to find a place that isn’t heavily fished, and experiences low boating pressure, but if that isn’t possible, just fish when they aren’t there.
Winter (Ice Fishing!)
If you’re fishing in the winter, you can still use the vast majority of the items I’ve talked about. If you’re ice fishing though, your way of going about things will be a little different.
Jigging
When you’re ice fishing, you can’t really troll a line. Instead, you do something called jigging. You’ll still want a dodger, flasher, and bait on your line, but be careful about the weight. You want the rise and fall of the things you have on your line to look natural, and if you have something like split show on your line, you run the risk of having the weight fall faster than you want it to.
Jigging involved moving your line up and down in a vertical motion that is meant to give movement to your tackle that will attract a kokanee. Do it smoothly, and slowly, and quick jerks on your line may be perceived as threatening.
Time of Day – Early Morning, Evening
Regardless of the location you’re fishing, you’re going to have more luck when the kokanee are more actively “out and about”. I’ve ALWAYS had the most consistent luck catching Kokanee when it’s darker, and colder.
Kokanee are a very temperature sensitive fish, and will actually die if they spend too much time in water a little higher than sixty degrees. When it gets too warm, they leave for colder water, which means getting away from the shore, and deeper into the water, making them a little harder to find a fish for.
Because of their temperature sensitivity, and their penchant for following their main source of food (zooplankton), they’re a little predictable as far as depth and location goes. Fishing for them when the water has cooled down has always given me the best catch.
Fish finder – Raymarine Dragonfly 4 PRO
I use this specific fish finder for several reasons. It doesn’t fog up, it uses a mix of different imaging to give me the best possible image, and it has built in WiFi, which means I can connect it to the app on my phone to get readings there. It also has the range of imaging I need, giving me a good view of what’s going on underneath my boat for the depth I usually fish.
You’re going to want a fish finder for a couple reasons. It will tell you where the fish are, which includes telling you how deep they are. With kokanee being so temperature sensitive, they change depth fairly frequently, you run the risk of trolling above or below the fish, even if your boat is right above a school of kokanee.
Now that I have a fish finder, I’m never going to fish without one again, ESPECIALLY when I’m fishing for kokanee. It’s so much easier to fish and not feel like you’re wasting time when you actually KNOW there are fish down there.
Dodger – Shasta Standard Sling Blade Dodger
This dodger is EASILY one of the most important pieces of gear that I own. I easily started catching more fish once I added this to my repertoire. The largest kokanee ever caught was caught using Shasta gear, so clearly the fish like it.
I was personally introduced to this dodger through internet searches, trying to up my fishing game. Dodgers swing around in the water, providing movement and a noise that attracts fish. Kokanee salmon are curious, territorial, and aggressive, so if there’s something in their space that isn’t obviously going to eat them, they’re going to check it out.
Flasher – Mack’s Lure Flash Lite 4-Blade Series
The combination of flashers and dodgers can trick the territorial kokanee salmon into thinking there is a small school of fish intruding in it’s space. Flashers work together with dodgers you’re fishing with. Dodgers are generally bigger and meant to produce a thumping kind of noise, flashers bring the light down to where the salmon are, which catches their attention.
I use this flasher specifically because there are several flashers along the length of line, which could mimic several smaller fish. It comes in a variety of colors, so customization is available (and fun), and it produces very little drag on my line.
Snubber – Luhr-Jensen Great Lakes Snubber
Kokanee salmon, along with some trout, are notorious for their soft mouths, which have foiled many a fisherman and kept them from what surely would have been their “biggest catch yet”. Some fisherman claim that the kokanee’s mouths don’t tear as easily as they get closer to spawning season, but if you don’t want to wait that long, try a snubber.
Snubbers stretch and take the extra pressure when the salmon starts fighting back, reducing the chances that the hook will tear through their mouths, or that your line will break, and setting the hook in the fish’s mouth before they put all their weight or force on the hook.
While a more experienced fisherman might argue that a snubber isn’t necessary when you’re fishing for kokanee salmon, my fishing friends and I all agree that we’ve never regretted having one. Once that fish is on my hook and I have to start fighting him, I’m more than happy that I’ve taken every precaution I could to make sure he stays on my line.