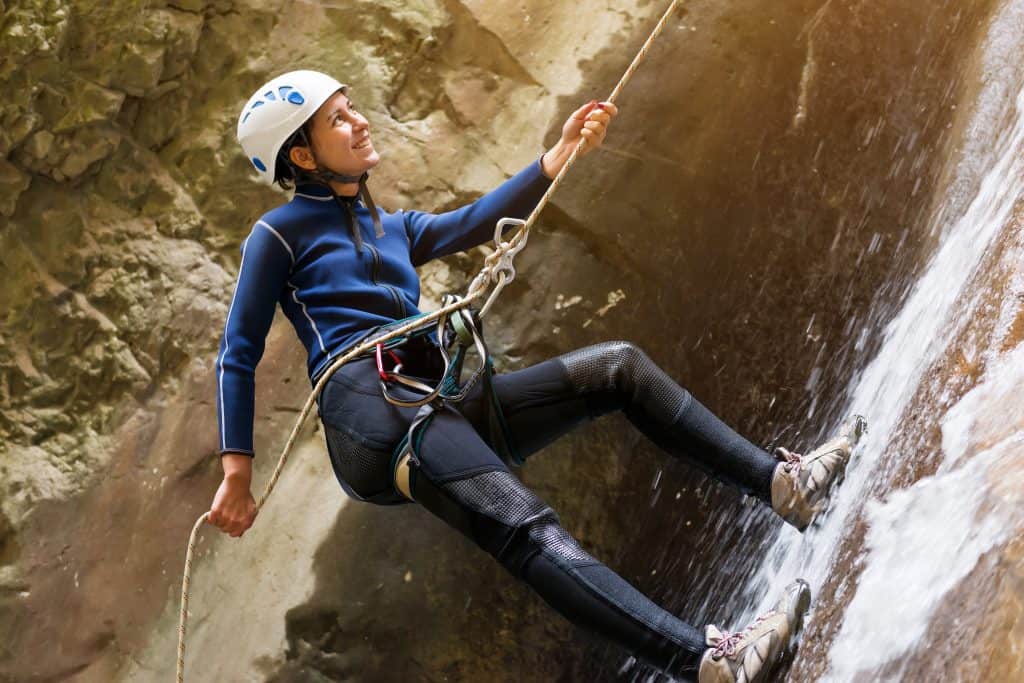
So you have climbed up to the top of an awesome rock and now its time to rappel back down. But what do you do when you get to the bottom and your rope is still hanging and tied at the top? You definitely don’t want to leave your perfectly good rope. (Although someone would probably be very happy to come along and find a free rope.) The first step to ensuring you can retrieve a rappelling rope actually starts before you even descend.
First, I will describe how to retrieve a rappelling rope using two ropes. I find this to be the easiest method, but carrying two ropes can be heavy and cumbersome. But sometimes you need two long ropes depending on the length of your rappel. I will also explain the procedure with one rope.
Retrieve a Rappelling Rope: Two Rope Method
Step 1: Tie your Two Rappelling Ropes Together
First, tie your two rappelling ropes together using a double figure-eight fisherman’s knot. (See our article here on how to tie the double figure-eight fisherman’s knot.) The double figure-eight fisherman’s knot is an extremely strong knot and the only knot you’ll want to use to tie your ropes together. After you have tied the two ropes together, stack the two ropes separately. When I say stack your ropes, this doesn’t have to be anything fancy. Just run the ropes through your hands to ensure there are no knots and the ropes are not twisted up.
Step 2: Safety Checks
Safety first, kids. I, personally, am the type of person that doesn’t like to waste time and I’ll jump into my activities with out much thought or preparation. I’ve had to teach myself to ALWAYS do my safety checks when I am rappelling. First give a double check to your double figure eight fisherman’s knot. Make sure it has been properly dressed and the ropes run parallel through the knot. This knot is crucial and you will take a hard fall if it fails. Check to make sure the rope can go though the metal descending ring and the chains or slings are also in good condition. If the chains or slings look like they are worn, add webbing or a new sling.
Step 3: Pick a Rope
All members of your group need to know which rope to pull. Take a look at thee descending ring. Which side is the knot on? Leave that side there and rappel down the opposite rope. The knot will jam at the ring so you can apply weight on the opposite side. Make sure everyone knows which rope to pull. If the wrong rope gets pulled the knot will get jammed in the rappelling ring. It’s a messy situation. It helps to tie two different colored ropes together so there is no mistaking which rope to pull. I may be making a big deal out of this, but the wrong rope gets pulled more often than you would think. If you don’t catch that mistake early, you’ll create a lot of work for yourself later on.
Step 4: Check the Ropes, AGAIN
I know, I know, lots of checks. All your fun will be ruined though if you brush over all the checks. Make sure the ropes are not crossed over or twisted on the chains or slings. Both ropes should lay nicely down the wall with out twisting into each other. Even just one twist or hang up will cause problems in the anchor ring and make it impossible to retrieve a rappelling rope. This is something to keep in mind as you are rappelling as well – sometimes the ropes can twist while you are rappelling so be cognizant of that so you don’t have any trouble retrieving your rappelling rope. Something else to check for. When you begin rappelling in the first 15 feet, check for any extra grooves, or notches in the rock, really anything that your rope could get wedged in. When you rappel down, look for anything protruding out of the rocks or anything the rope could get hung up on while your pull the rope down. This is especially important if you are the first person down. Try to avoid any area where the rope could get caught and prevent the rope from falling freely to the ground. Attach your rappel device to the ropes and carefully climb over the edge before putting weight on the ropes.
Step 6: Go Down with a Guide Finger
This step is mainly for the last person who descends the rope. Essentially, this person should make sure the ropes are separated and haven’t become tangled and are still lying flat. They should also make sure there are no kinks in the rope by the rappel device. The last person rappelling should use a finger of their guide hand above the rappel device and guide their finger between the two ropes as they descend. Just by doing this, the ropes stay separate from you and the anchor and keeps the rope from twisting. If the ropes get twisted, you will not be able to retrieve your rappelling rope. You’ll have to ascend the rope, untwist them, and rappel back down. It’s really not an ideal situation.
Step 7: Retrieve a Rappelling Rope
After you and your rappelling partner have both reached the bottom or the next rappel station, it’s time to get your ropes down from the top. If you have carefully inspected the ropes and made sure to avoid any hang ups and twists on the way down, the ropes should be easy to pull.
If you have reached a station and will be doing multiple rappels, start placing the end of the rope through a new descending ring while you pull. This will save you a TON of work!
Here are the safety concerns to be aware of while you retrieve your rappelling rope:
- Watch out for falling rocks. The rope can sometimes kick up some dust and rocks on its way down. This is when a helmet comes in handy. (If you need help picking out a helmet, check out our article, here.) Keep your head down so you don’t get particles in your eyes and so you don’t get a smacked on the face with a rock. Even the small ones can really hurt!
- Watch out for the free end of the rope. Once it is free falling it can really hurt! Almost like a whip, so stay out of its way if you can! It will leave a mark, for sure.
- Communicate! Let everyone around you know a rope is coming down so they can be sure to avoid falling rocks and lashing ropes!
Retrieve a Rappelling Rope – One rope meathod
Now, I just described how to retrieve your rappelling rope with two ropes. Not too shabby. Just a double figure eight fisherman’s knot and the safety checks. Now I will describe the procedure to retrieve a rappelling rope when you only used one rope.
This should be done when you have a rope long enough to reach the ground with both ends of the rope. After both ends of the rope reach the ground, tie a double figure 8 on the bight of the rope. Pull one end of the rope up and thread it trough the two rings on the anchor. There should be chains and rings attached to the anchor point, add them if you have the equipment on hand to do so. You will have to leave it there, but consider it a contribution to the climbing community. Someone will be happy to find it someday. Threading your rope directly through the anchor will add a lot of wear to the anchor. Rappel on the side opposite of the knot to keep the rope from dropping through. Perform all the same safety checks mentioned above. (Always double check your knot, be sure you are pulling the right-side rope, and avoid and potential snags and hang ups on the way down.) When you get to the bottom, or the next rappel station, again, follow the safety checks. To retrieve a rappelling rope, pull the side of the rope that is knotted at the top and the rope should freely fall down.
There are other ways to rappel down with one rope and retrieve a rappelling rope at the bottom. In fact, as rock climbing and rappelling increases in popularity, there has been an increase in technology and equipment. You can tie a knot in some webbing and attach your rope to it, there is metal equipment to attach your rope to, and so on. While doing extra research on this topic, I found some very unsafe methods that I would never use. They are way too risky and leave too much room for error and accidents. Always do thorough research and consult with a trained instructor who can teach you correct methods for using the systems and equipment. The methods I have outlined are just some of the easiest, most straight forward ways I have found to retrieve a rappelling rope. With the easiest, most-straight forward ways, there is less room for error, making it safer in my opinion.
Remember to always check your knots, make sure they tight, and dressed neatly. Don’t try any knew methods with out trying them in a climbing gym or consulting with an experienced instructor or guide. When in doubt, don’t try it out. That’s my motto.
If you need to pick a new rope, because you weren’t sure how to get it back down after your last rappel, check out my recommendations for ropes. Enjoy your rappel and I hope this has been helpful to you.