When building an igloo, snow bricks are the ideal base for your wintry construction project. The bricks look so much better than packed snow and provide structural security as well. How do you make the perfect snow bricks for building?
Best Method for Shaping Snow Bricks:
- Buy or make your snow brick mold
- Dig out crunchy, moist snow a few inches below the top
- Insert the snow into the mold and pack it in
- Release the snow brick from the mold
- Make more snow bricks
- Decorate the bricks as you wish
As the steps above prove, making a snow brick doesn’t have to be a challenge. Keep reading for more information so you can begin constructing awesome-looking snow bricks!
What is a Snow Brick?
Before we go into how to make the perfect snow bricks, let’s quickly go over what a snow brick is.
A snow brick is a building block made of compacted snow and is generally used to create structures, including snow forts and igloos. Just as builders use bricks or cinder blocks to construct houses and other structures, snow bricks are made of snow for building purposes.
The steps for making snow bricks are discussed in detail below, but essentially it involves packing snow tightly into a mold or shaping it by hand to form individual bricks that can be stacked together. The objective is to make a solid and stable structure by using the adhesive properties of snow when it freezes and bonds together.
Creating and using snow bricks is common in places with heavy snowfall for recreational purposes or as part of winter activities.
Snow bricks are a fun and creative way to engage with snow that uses one’s skill and imagination. Tools, such as molds, shovels, and buckets, shape snow into bricks that can be assembled into more extensive constructions.
6 Steps for Making Picture-Perfect Snow Bricks
1. Buy or Make Your Snow Brick Mold
You want perfect snow bricks, and that requires having a reliable means of making brick after brick.
The consistency is not only for the look of the snow bricks but to ensure each one is structurally sound and ready for wintertime building too.
So how do you make the perfect snow brick with reliable consistency?
You have several options, so let’s go over them now!
- Small Cardboard Box
Do you have a cardboard box handy that’s about the same size as the snow bricks you want to make? If so, then you can always use that as your mold.
The cardboard should be thicker to ensure it can hold up to the wet, packed snow well.
We’d recommend covering the entire inside of the box with masking tape or duct tape to prevent the cardboard from soaking through, even if the cardboard is thick.
Do keep in mind that soaked cardboard is pretty much inevitable though and that you won’t be able to use the cardboard box again. Make as many snow bricks as you can today and retire the box by the day’s end!
- Plastic Box or Container
Any kind of plastic container or box that’s shaped roughly the same as a brick is a surefire winner for making snow bricks.
Unlike cardboard, plastic won’t begin deteriorating if it gets wet. You can make a dozen or three dozen snow bricks today and still have the container available to use tomorrow.
If it’s a long weekend or school is closed for several days in a row due to a bad storm, you’ll appreciate having the option to make snow bricks for days, as you can keep the kids entertained.
- Square-Shaped Bucket
In the same vein is your next option, which is to use a square-shaped bucket.
If you can’t find such a bucket, you can always make one using a regular-shaped bucket. You’d need some straight plastic inserts that you could slot into either side of the bucket.
Although the edges of your snow brick wouldn’t be perfectly rectangular, the resulting product would be brick-like enough that you could easily lay down bricks to make an igloo for the kids.
- Snow Brick Mold Maker
By far the easiest and most convenient method for making snow bricks is to use a snow brick maker like seen here.
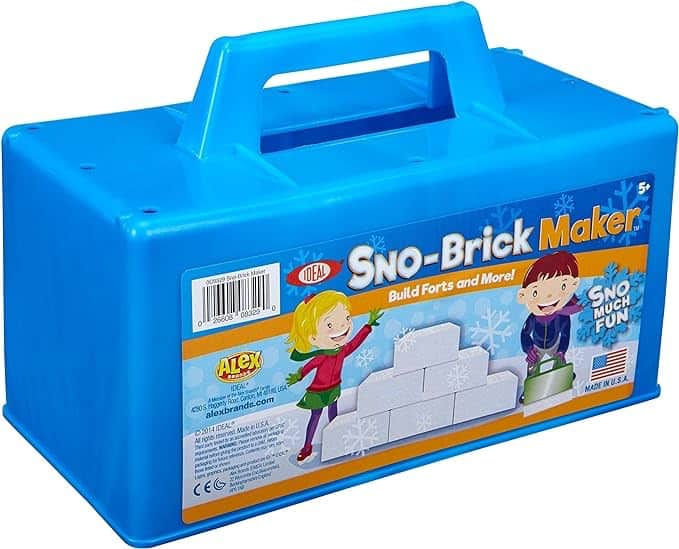
Snow brick makers are designed exclusively for wintertime fun. They work the same as any plastic container but with a closable lid that will pack the snow down enough that the bricks come out compact.
2. Dig Out the Snow
Okay, so you’ve got your mold. Now you need the right kind of snow for making snow bricks.
What snow is that?
Ideally, you want crunchy, moist snow with a good amount of free water content in it, such as around eight percent.
Free water content, which you might recall if you’ve seen our other posts on snow structures, is like glue that holds snow together.
Too little glue and the snow won’t stick, yet too much and it’s a slushy mess that also won’t be in good enough shape to make snow bricks.
That’s why the free water content should be around eight percent and no higher than 13 percent.
While using powdery snow is okay if you’re making a snow igloo or a snow cavern since you can always soak the snow with a garden hose, doing that when making one snow brick at a time is incredibly time-consuming.
Related Reading: Can you Make an Igloo with powdery snow?
You’re better off waiting for the right type of wet snow than you are trying to force powdered snow to be more workable.
When choosing snow for your bricks, don’t just skim snow off the surface. Dig an inch or two deep into the snow and come up with handfuls of pristine packed snow to use.
3. Insert the Snow into the Brick Mold and Pack It
Take each handful of snow and place it into your snow brick mold. Depending on the size of the mold, you might need a third handful of snow.
Don’t overpack the mold, though. If you’re using a snow brick maker, you won’t be able to close the lid. You only need enough snow to pack the mold to the top.
Pack the snow down once it’s fully loaded into the mold to compact it and give it shape. This might require you to add a touch more snow to fill the mold to the top, which is fine.
Level the snow off with your hand, close the lid (if that’s what yours uses), and you’re underway making your snow brick!
4. Release the Snow Brick from the Mold
When you’re ready, you can release the brick from the mold.
In the case of a snow brick maker, you have to open the lid first. For every other DIY brick maker option you might use, there’s no lid, so you save a step there.
Lift the mold up and then tip it over slowly and carefully. If you followed the above steps properly, then a truly perfect snow brick should be released from the mold.
What if the snow is too tightly packed in there and it doesn’t want to come out? You can gently knock on the back of the mold to loosen the snow from the plastic (or cardboard). That ought to do the trick.
Resist the urge to shake or bang on the mold, as that can destroy your snow brick before it even comes out!
5. Make More Snow Bricks
The first time you make a snow brick can be very slow going, as you’re still getting used to the entire process.
After doing it once or maybe twice (perhaps even a few times), you’ll begin to grasp what the process entails.
You’ll learn just how much snow to grab, how to pack the snow in, and how to get the snow brick out of the mold without a headache.
This all expedites the process so you can begin doubling your snow brick output.
6. Decorate the Bricks
If you so choose, you can decorate each individual snow brick ahead of building with them to give them flair and personality.
This doesn’t have to slow down your brick-making process, either.
You can always hand over the completed bricks to the kids to let them work their magic on them by decorating with edible food coloring, glitter, or whatever they wish.
If you’d rather wait to decorate the snow bricks until after you do something with them, that’s a perfectly fine idea as well!
Visit our Winter/Snow Page for More Great Content!
What Can You Build with Snow Bricks?
Now that you’ve got several dozen snow bricks (or maybe even more), it’s time to begin building with them! This is by far the most fun and rewarding part, but what exactly can you make with snow bricks?
Try any of these structures!
Snow Bricks to Make an Igloo
One of the most popular uses of snow bricks is to construct an igloo.
The bricks, as we talked about briefly in the intro, give the snow fort a much more realistic and professional look compared to building the fort out of compacted snow.
Make to reinforce any gaps or openings between the bricks with packed-in snow. This will prevent too much air from entering the igloo and keep it structurally sound.
Snow Bricks to Make a Snow Fort
If not an igloo, then the second most popular project for snow bricks is undoubtedly a snow fort.
A snow fort can be your children’s palace as they play out their snow days.
The entire fort doesn’t have to be constructed of snow bricks, but its design is completely up to you. Have fun and make something the kid will talk about for a long time to come.
Check out our Top Tips to Make a Snow Fort and Are Snow Forts Dangerous?
Snow Bricks to Make a Wall
You can also keep it simpler and build a snow wall with your bricks.
The snow wall can be an excellent place of refuge and strategy when having a snowball fight with the other neighborhood kids.
It’s a lot easier to make a snow wall than it is an entire fort, and it’s good practice for building more complex structures later on.
Decorative Structures
You can also use your snow bricks for a creative decorative project. Although snowmen aren’t traditionally made of snow bricks, any other snow structure could be!
Can You Use Any Snow to Build Snow Bricks?
There are ways to use all types of snow when building snow bricks, but as we discussed previously, wet snow will be best. Moisture or water is equivalent to snow glue by holding the snow crystals together. This way, they can bind together in the shape of a brick.
Powdery snow is difficult to work with as it has limited moisture. You can turn powdery snow into a more wet and sticky type of snow with additional steps.
To make powdery snow more sticky, you only need a little water. We use two methods to achieve this: the outdoor hose or a bucket of water.
1. Outdoor Hose Method
For optimal stickiness, it’s advisable to construct your snow structure near a water source, mainly when dealing with powdery snow. Grab your garden hose and attach it to the tap if you’re working in a side yard or backyard with pristine, untouched snow.
Use a gentle water spray; the goal is not to oversaturate the snow. Wet the snow until you can feel the moisture on its previously dry surface, then turn off the hose. Now, you’re ready to start working with the dampened snow.
2. Water Bucket Method
The bucket-and-water method is a viable alternative, especially when quickly moistening large quantities of snow.
As you walk with the bucket, be mindful of potential spills if the bucket tilts. Pour the water onto the powdery snow and observe a rapid change in its texture.
Further Reading: How to Make Powdery Snow Stick
Final Thoughts
Making the perfect snow brick is easy once you have a good mold and the right type of snow. We hope the information in this guide helps you foster family togetherness with the kiddos all winter long!