When you first get started working on raw land–or if you already have a cabin with no indoor plumbing–one of the first conveniences you’ll want is a shower.
I know from experience that working all day in the sun in a dusty environment makes it tough to sleep at night whether you’re climbing into a bed or a sleeping bag. But there’s really no need to suffer a long weekend away without ever getting yourself clean. Not when a simple shower is so easy to build.
Step 1: Plan It
Before you get started, you need to figure out what you want in a shower. Mostly, you just need to decide how big you want your “building” to be.
As you think about that, here’s something to keep in mind. This shower is outdoors, so unless you want to walk out of the shower and to your tent in a towel, you probably want enough room for dressing. Also, if you ever have little kids at your cabin, you may need enough space for a parent to help their little ones get clean.
All that said, a shower stall that’s about 4 ft by 4 ft (1.2 m by 1.2 m) is probably plenty of space.
To allow for a little privacy, it’s also nice to have a little entryway with a short internal wall that blocks the actual shower stall from view from the outside.
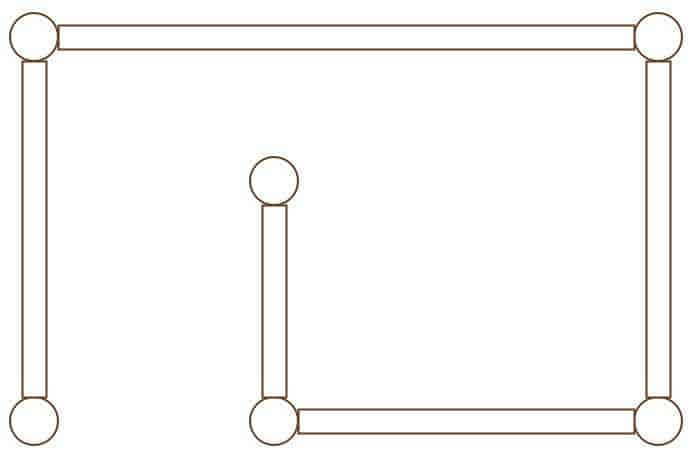
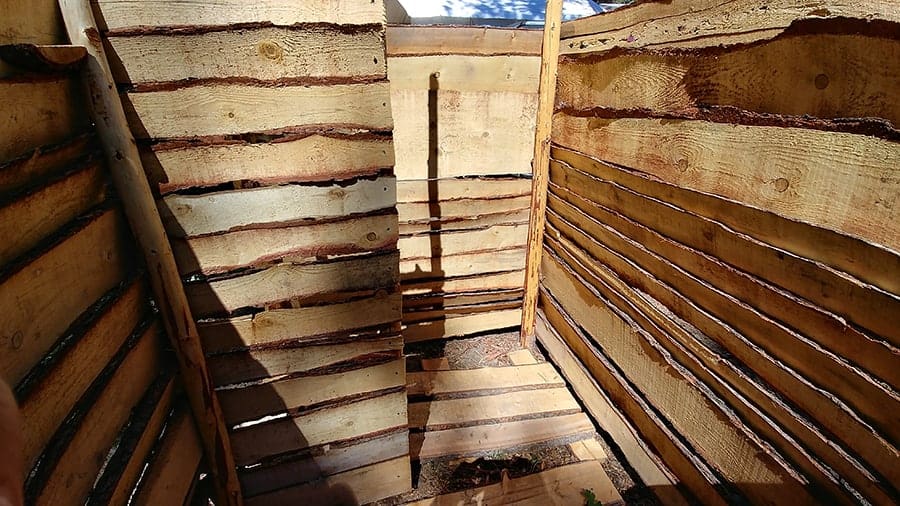
Here’s a basic drawing from above of how our shower is designed. Again, nothing elegant. Just a simple rectangular spiral shape. The square on the right side is the actual shower stall. We have our shower faucet hanging up on a hook on the lower right post. The full length of this is about 6 1/2 ft (2 m) with the square shower stall being 4 ft (1.2 m). This means the entryway is 2 1/2 ft wide.
Do what makes the most sense for you obviously. This is just an example of how you might plan out your shower.
Step 2: Level Out the Ground
The last thing you want in a shower is to have to lean just to stay upright.
The ground in this sort of shower doesn’t have to be perfectly level. But eyeballing it is dangerous. I’ve learned by sad experience that when you’re leveling ground on a hillside, what looks level is usually not even close to level.
So grab a level.
Start by eyeballing it. Use a flat head shovel and get the ground underneath your shower fairly level. I would go about 6 inches or more extra in each direction to give you some working space.
Once it looks fairly level, start spot checking it. Lay the level down on the ground, or even better, on a long, flat board, and check all different directions. Again, it doesn’t need to be perfect. But get it reasonably level and you’ll save yourself a headache and maybe a slip or two.
Step 3: Set the Posts
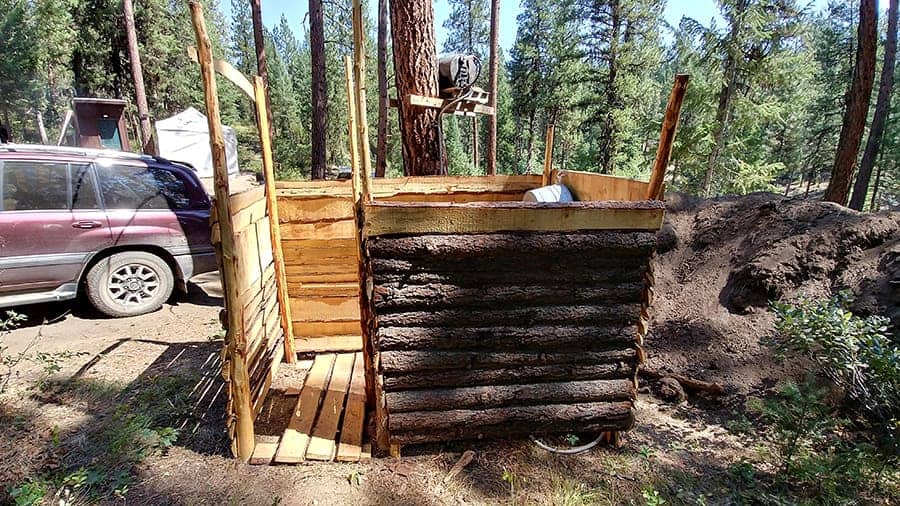
To build this really simple shower, the easiest way to go is to set 6 posts in the ground. As you can see, we used materials from the property itself. But if you want you can purchase some posts. I would probably use treated 4×4 posts for this. For length, I’d shoot for about 10 feet long. This will give you a few feet to go underground which will make your walls sturdy.
Use a post hole digger or a shovel to dig a hole for each of the 6 posts. Dig down 2 to 3 ft (60 to 90 cm). Once your holes are dug, set your posts in one at a time and fill them back in with dirt. If you want something a little more permanent, you can drop in a bag of concrete mix, but that seems a little overkill for this outdoor shower.
As you fill the dirt in, hold up the posts as straight as you can. It’s fine to eyeball it, but if you’re particular like me feel free to use a level.
Tamp down the dirt well so that the posts feel sturdy. Pouring some water over the loose dirt will help it settle.
Step 3: Build the Walls
Once the posts are in, building the walls is fairly simple.
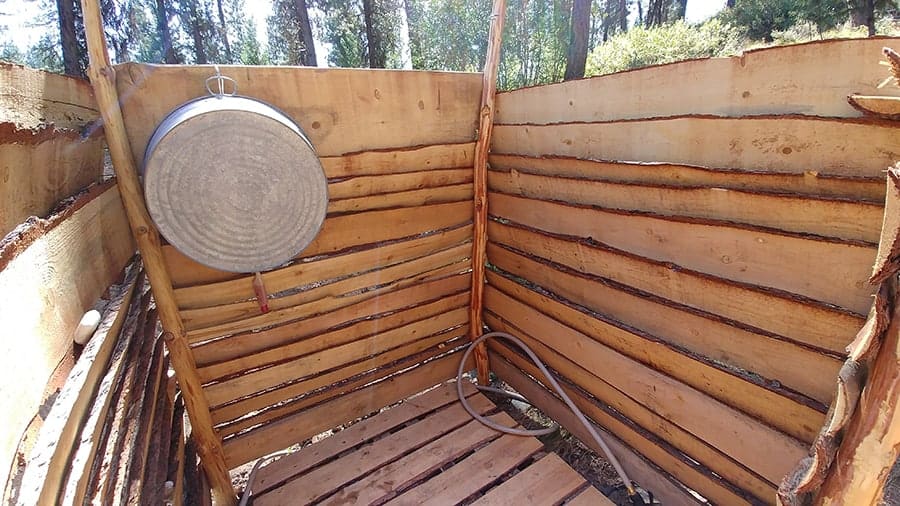
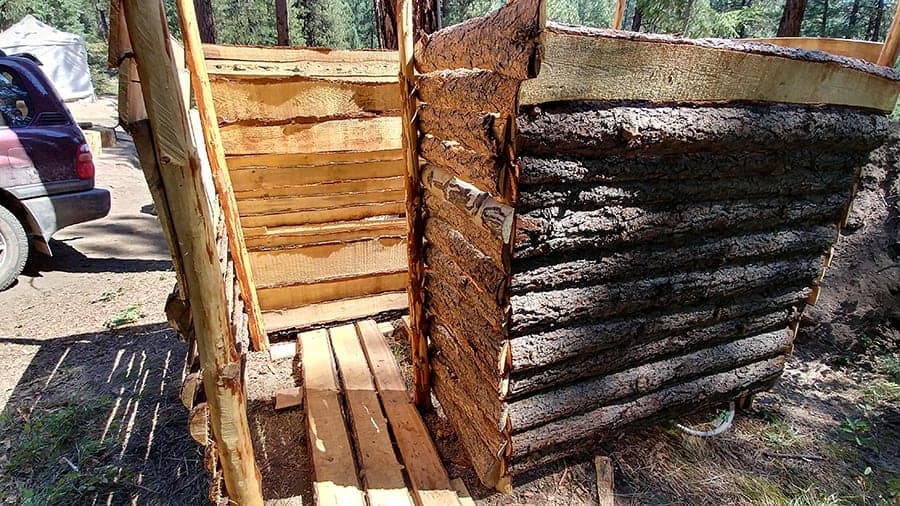
We used wooden slats, and I would recommend the same. If you have access to a mill, like we have, then you can use 1/2 or 3/4 inch thick slats cut from the trees on your own property. If not, then try a lumber or hardware store for some 1×6 or 1×8 boards.
Cut the slats to length so that they’ll reach the posts on a particular wall. Cut enough so that you can lay them side by side with no gap and go from just above the ground up as high as needed to give you the privacy you want. With these mill-cut slats, we overlapped them a little so as to prevent any gaps between boards.
Do this for each wall in your design. If it’s like mine, there are 5 walls total creating the spiral effect and giving us an entry way for added privacy without the need for a door.
Step 4: Lay Some Flooring
We kept this really simple. You can see in the picture below that we laid a board (1 x 4 or 1 x 6) about every 1 1/2 to 2 feet and then laid planks across them. Leave a small space between each of the planks to allow water to fall through and to give you some traction. Just don’t leave the spacing so wide that you roll your ankle while showering.
Step 5: Hang the Water Barrel
There are only a couple ways to get water pressure to the shower faucet.
- Use a pump that will output the water at the pressure you want it.
- Use a water source that’s at a higher elevation than the shower faucet.
Those are really the only two practical ways to get water pressure for a shower.
The downside of the first option is that you need a pump that will output the water at a pressure you can use. In simple terms, you’ll need a larger pump for this option, and you’ll only run it when it’s time for your shower.
The second option allows you to use a smaller pump to fill a water tank that’s up high. The fact that you don’t need the pump to deliver the water quickly is what allows you to use a smaller pump. For our setup, a 1/2 hp pump was plenty.
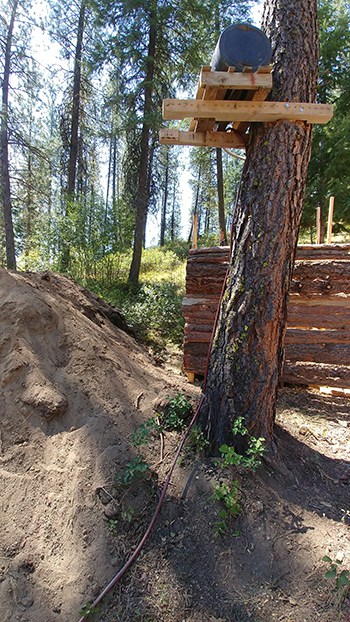
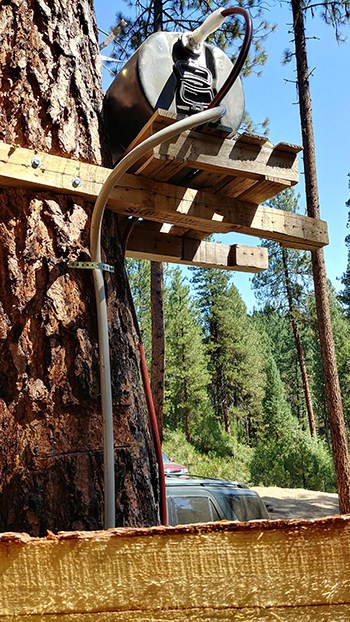
So now let’s get our water container mounted. For our mount, we used 2 4x4s from a pallet which we bolted into the tree with 2 8 inch long lag bolts on each board. Before we mounted them, we cut out a spot on the tree on each side that would allow us to place the 4x4s flush with the tree. Basically, the tree is round so to get a good hold we flattened a couple spots.
We then built a simple platform using an old pallet. Rather than do what we did (see the pictures) you could just run 4 or 5 2x4s between the two boards mounted to the tree and that would make for a nice platform. Then, just set the water barrel on top and secure it to the platform. The simplest is probably to nail a board in on the far side of the platform from the tree that just holds the barrel in place and keeps it from rolling.
If you don’t want to put your barrel up in a tree, or don’t have a good tree nearby, another option is to put your barrel somewhere uphill. The longer your hose, the more pressure you’ll lose, so if you have a hill very close, putting the barrel 12 feet (or 4 m) uphill is probably enough. Just remember that the higher up you go, the better water pressure you get. One the other hand, you have to get your water into the barrel, and that can mean either carrying water up there or pumping it.
These particular barrels usually come in a dark blue color. We decided that we don’t like really cold showers, and this water never seems to get warm unless you put the barrel somewhere that gets direct sunlight and you make your barrel dark. The dark blue can work well to heat the water, but even so, we decided to paint it black.
The water also likes to cool off overnight. So what we like to do is enjoy a nice day in the woods and then enjoy a shower at the end of the day. Then we’re nice and clean and able to get a good night’s sleep. It also allows us to take warmer showers because the water heats up during the day. Just make sure you refill your water barrel either after your shower, or first thing the next morning.
Step 6: Run the Water Lines
Once you’ve got your water barrel mounted somewhere high, you need to run your water lines.
First, if you decide to mount your barrel on a tree, or somewhere out of reach, you need a line for filling the barrel. A regular garden hose should work for this.
For our barrel, we used a 20-gallon water storage drum like this one. 20 gallons doesn’t seem like a lot of water, but it’s enough for a couple showers if you don’t run the water constantly.
The benefit of a smaller container like this one is that heating the water is easier. We’re relying on the sun to do our heating and it’s a lot easier to heat the water in this than it would be in a larger container. That said, you can buy a similar water drum that’s 55 gallons here. I just don’t recommend hanging that in a tree.
The nice thing about these water drums is that they have 2 openings. And they have caps that are designed to screw into. So you can screw one hose to an adapter at the inlet on top and then use an adapter to connect a hose on the outlet that will go to the shower.
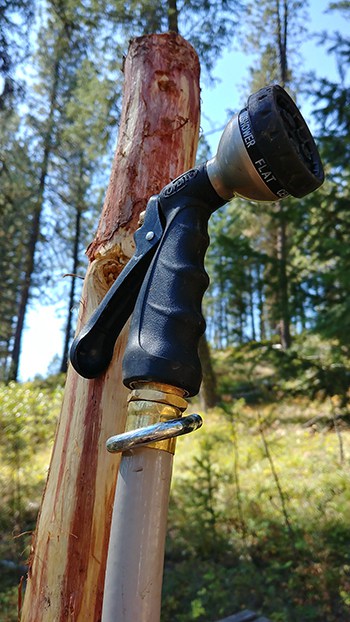
The outlet is just a hose running to the shower. We decided to use a simple garden hose sprayer for the shower faucet for a
- It’s inexpensive compared to a shower faucet
- It’s made to withstand the outdoors
- You have to hold the handle down to use it, so you’re likely to use less water than you would under a normal shower faucet
These do have a little latch to hold the handle so you could just turn it on and place it on a hook and use it
Step 7: Outfit the Shower
What kinds of things would you want to have in a shower like this?
We put a hook on the wall and hung a wash basin. This is helpful if you’re really dirty and you want to capture a little water to use with a washcloth to get good and clean. Remember, we only hung a 20-gallon water barrel which can be plenty for a couple showers as long as you don’t keep the water running constantly. So use a wash basin and washcloth for scrubbing and use the shower for rinsing.
Depending on who will be using this shower, a small bench might be another good addition. Remember, this shower is probably doubling as a dressing room so having a bench or stool might be really nice.
Don’t forget a towel hook. It doesn’t need to be fancy, just a basic hook that screws into the wood is sufficient. In fact, you can use the same kind of utility hook that we used to hang up the shower nozzle.
What else should we include in an outdoor shower? Let us know your thoughts in the comments below.